作者: admin

  • How to Clean a Yellowed Clear Phone Case — Article Archive

    How to Clean a Yellowed Clear Phone Case — Article Archive

    How to Clean a Yellowed Clear Phone Case at Home

    If your clear phone case has gone dull, sticky or yellow, this guide walks through the safe home methods that actually work, what ruins a clear case, and how to tell when it’s time to buy a new one. Some yellowing washes off; some is permanent, and we’ll show you how to tell which you’re dealing with.

    Is Your Case Dirty, or Permanently Yellowed?

    The short answer: you can clean off grease, sweat and surface grime, but you usually can’t reverse yellowing that has already baked into the plastic. So before you grab any cleaning product, spend a minute figuring out which one you’re dealing with. They look similar at first glance, but the fix is completely different.

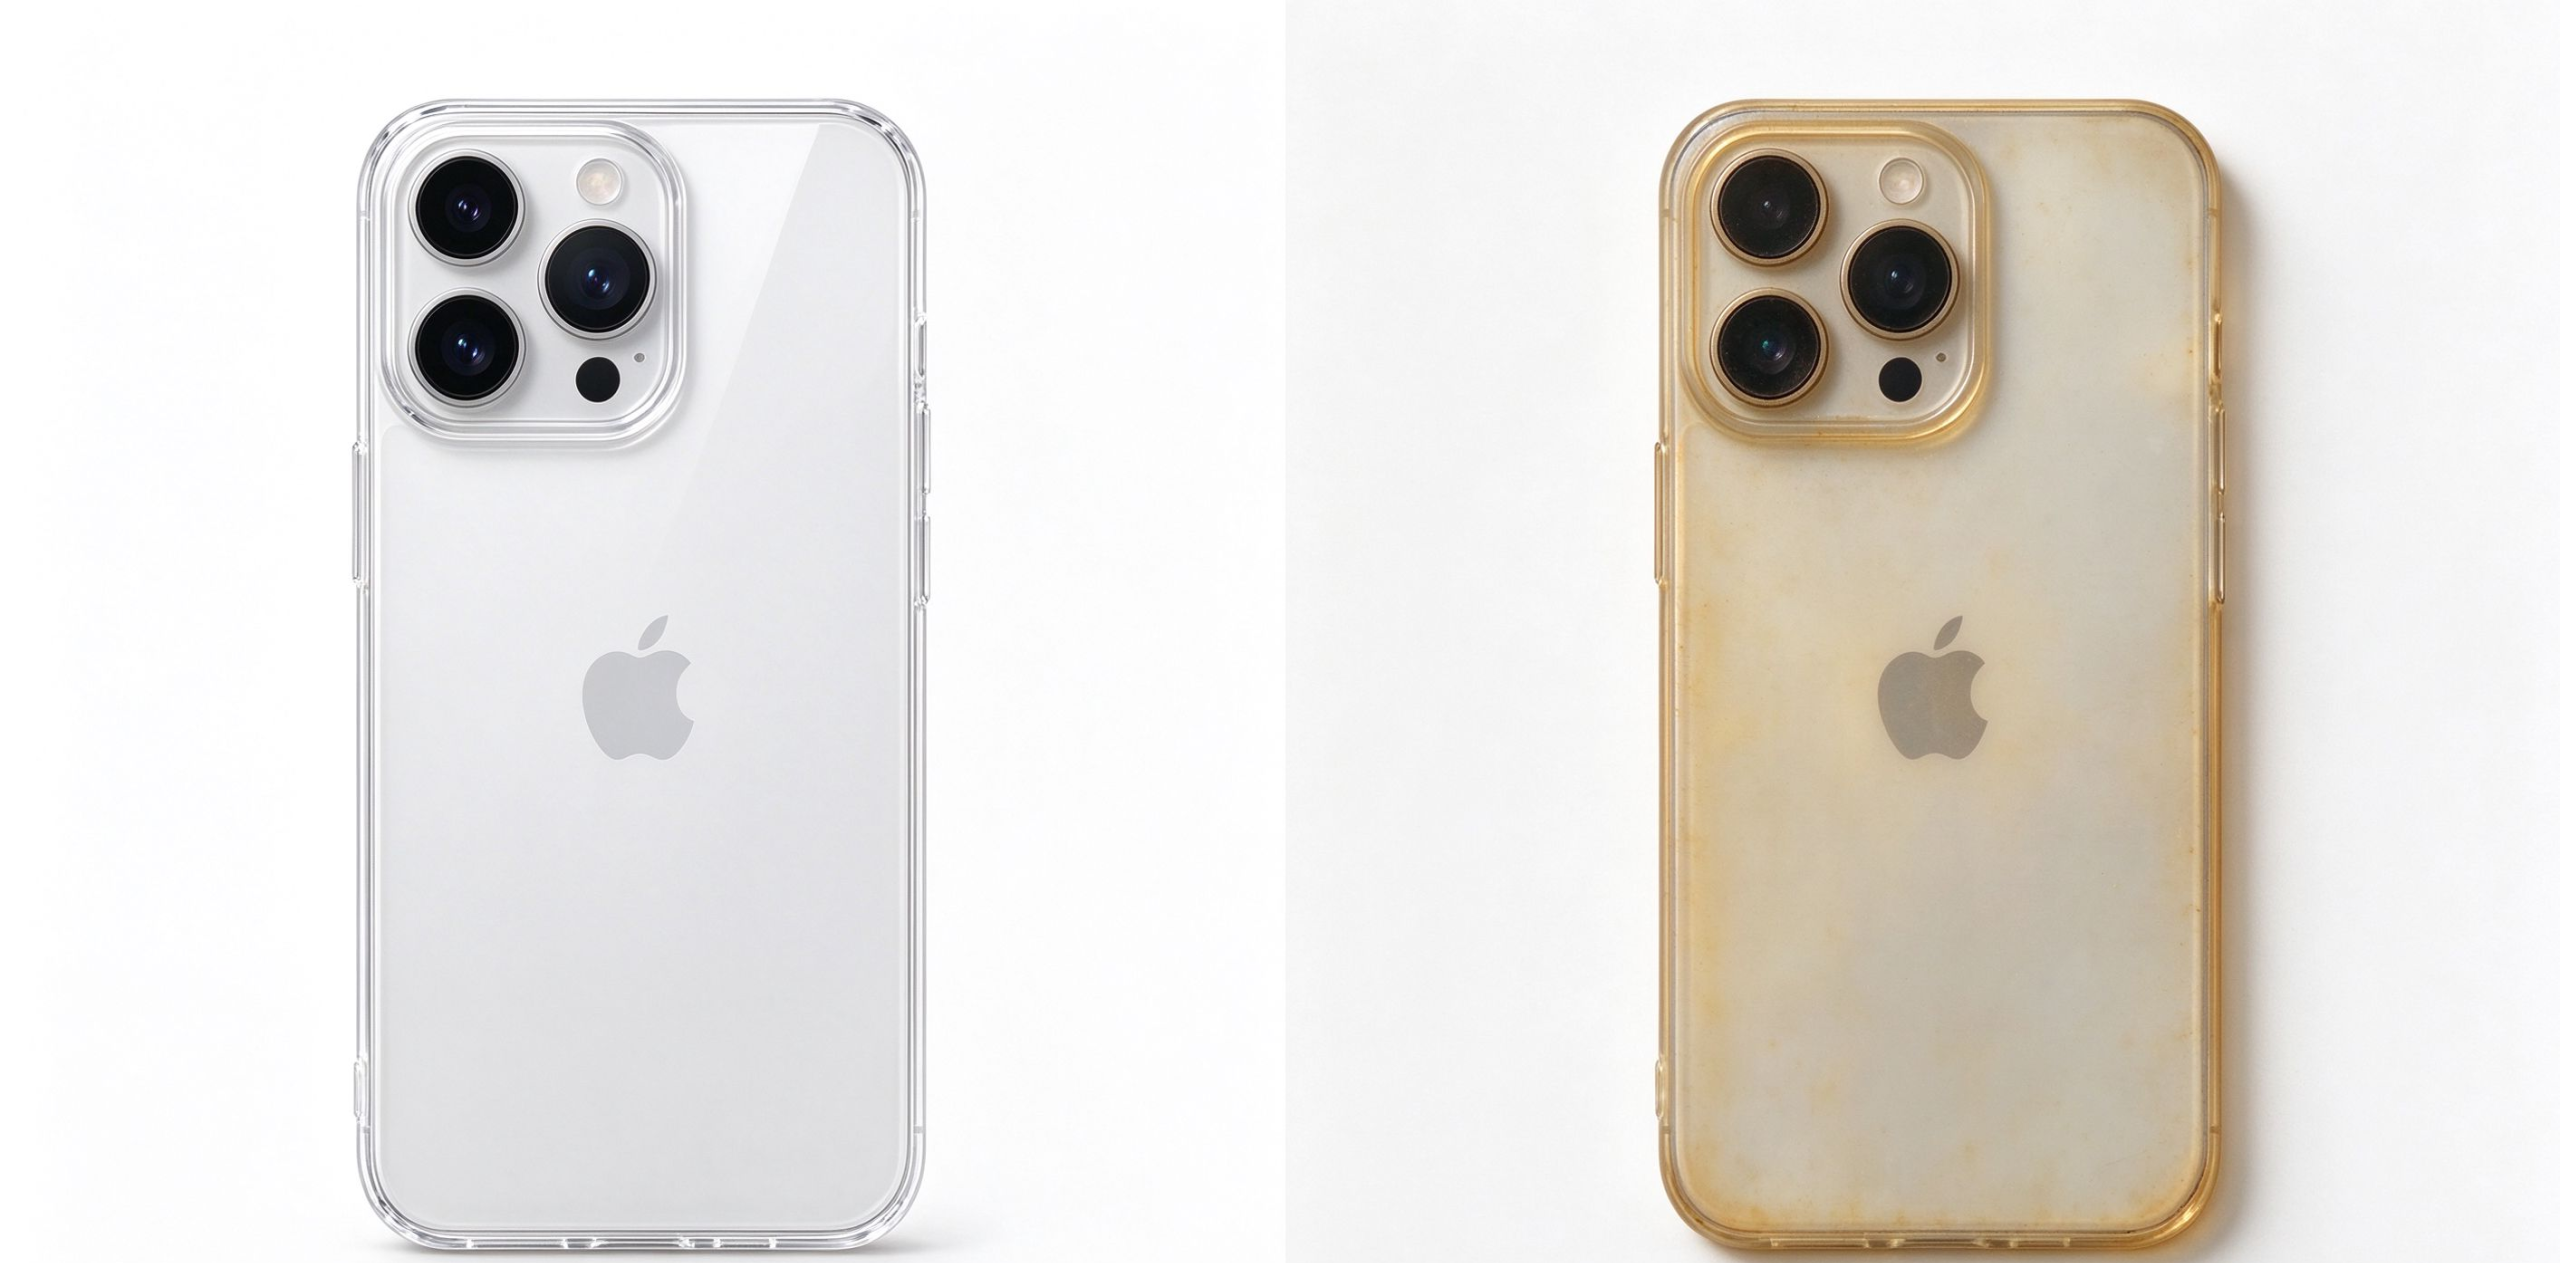
    Start with where the color sits. If the yellow is patchy, stuck around the camera cutout, the charging port or the inside of the case, that’s mostly oil, sweat and dust that has built up over weeks. Take my own clear phone case: compared with the day I bought it, it had turned dull and grayish all over, and the surface felt sticky under my fingers. The sticky, oily layer does wash off. But the dull haze and the marks left behind are a different story.

    I learned that the hard way. My first move was an old toothbrush dipped in toothpaste, which feels like the obvious household fix. The stickiness came off, sure, but afterward I could see fine toothbrush streaks across the clear plastic. The grime was gone; the damage wasn’t. That’s the difference between surface buildup and something that has already changed the material.

    Next, identify what your case is made of, because it decides which methods are safe later. Bend a corner gently. If it flexes and feels soft, you’re holding a TPU or silicone case — these are cheap, grippy and the ones that yellow fastest. If it’s rigid, clicks into place and doesn’t give under pressure, it’s likely polycarbonate (PC), a hard plastic that resists yellowing longer but scratches more easily.

    Why does this matter? Soft TPU and silicone absorb skin oils deeply, and they can react badly to alcohol or strong peroxide. Hard PC takes those chemicals better, but a rough scrub will leave micro-scratches that make it look cloudy. We’ll match the method to your material in the next sections.

    MaterialFeel and flexHow it yellowsChemical toleranceScratch risk
    TPU / silicone (soft)Flexes, soft, grippyYellows fastest; absorbs skin oils deeplyPoor with alcohol and strong peroxideLow to medium
    Polycarbonate / PC (hard)Rigid, clicks into placeResists yellowing longerHandles alcohol betterHigher; rough scrub leaves micro-scratches

    Quick rule of thumb: patchy, sticky, corner-and-inside grime = cleanable. Even, dry, whole-case amber or brown = permanent. If you’re in the second group, skip ahead to the signs it’s time for a new case; the cleaning methods below are mostly for the first.

    What You Need Before You Start

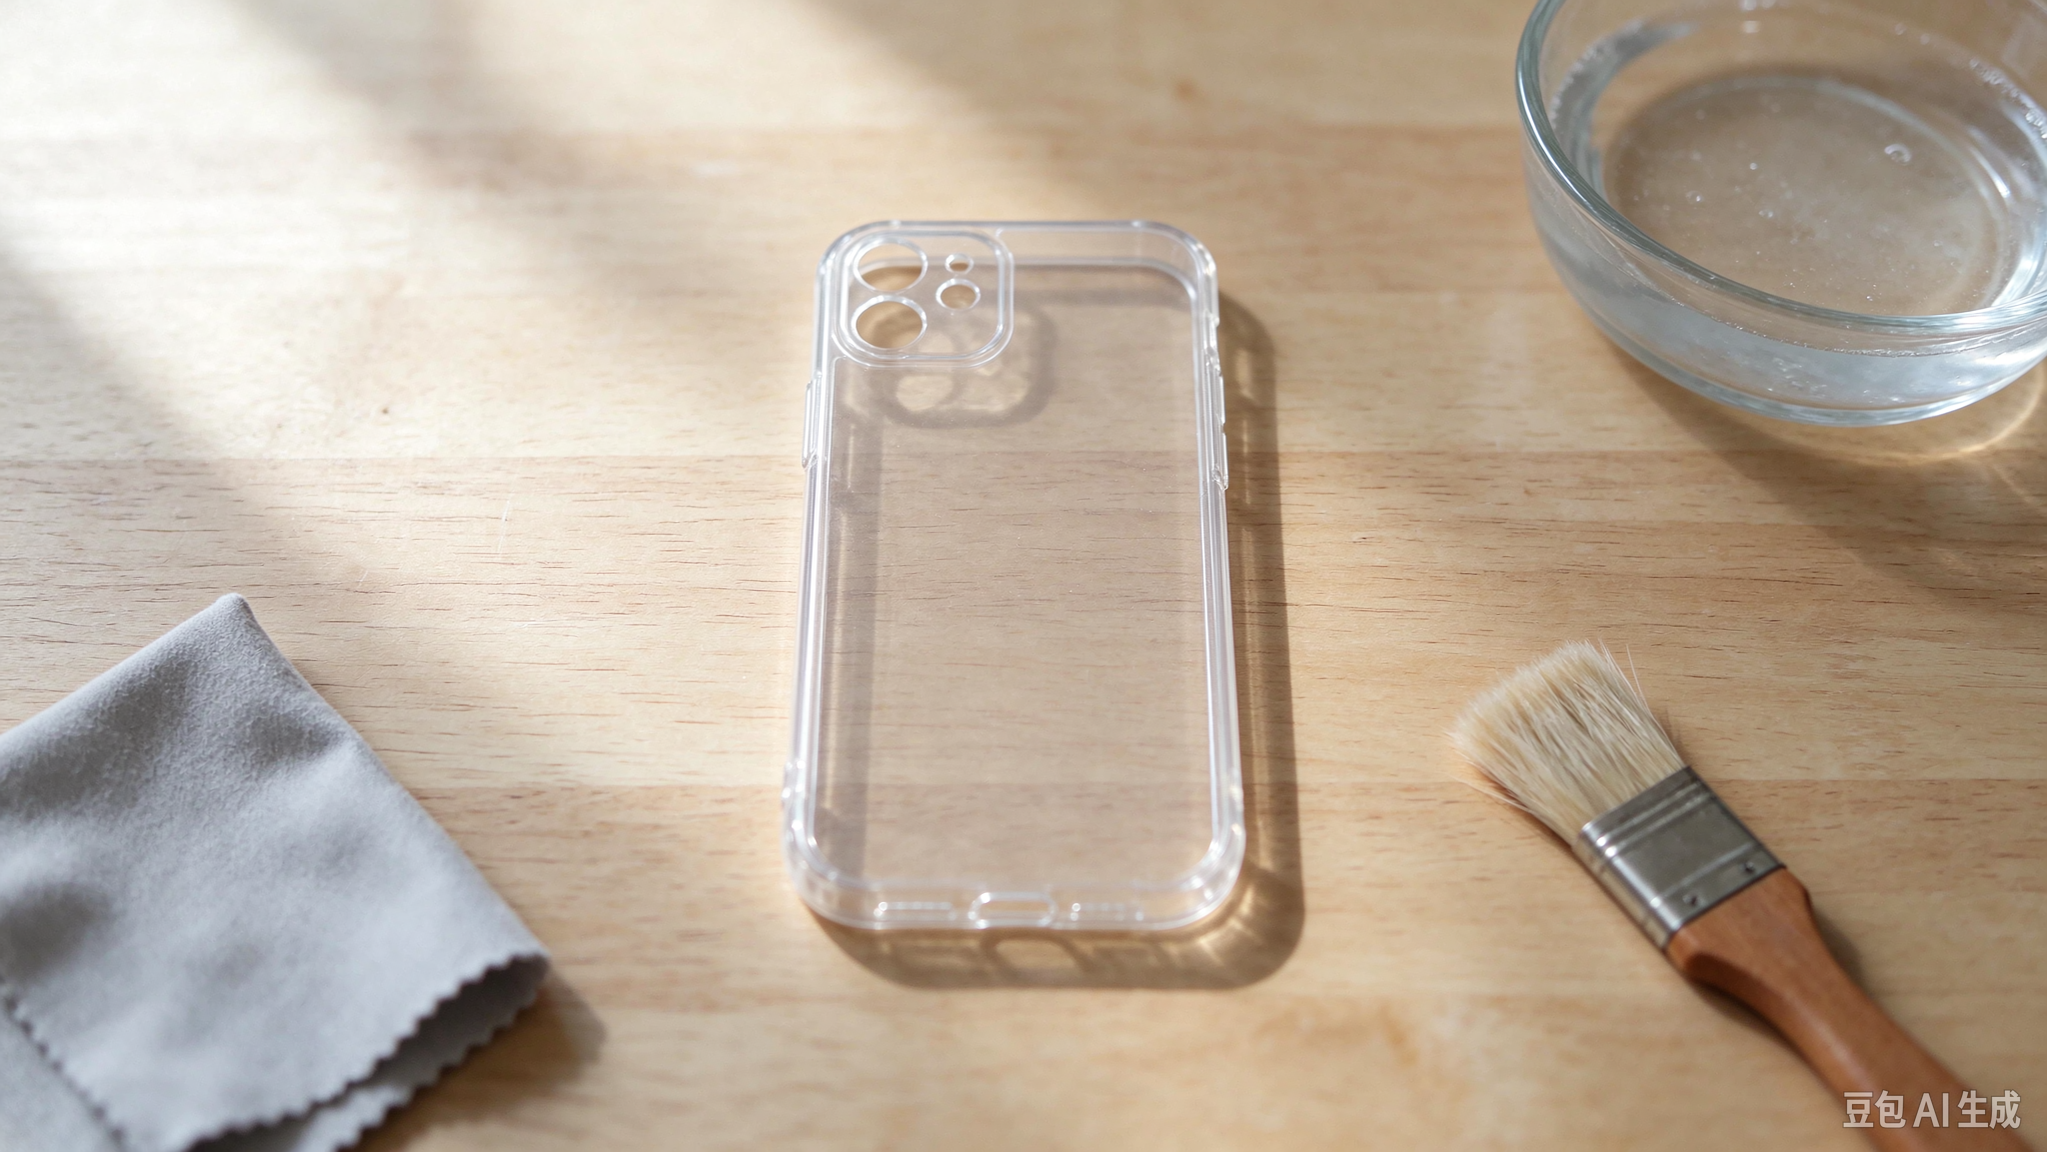
    You don’t need a special cleaning kit for this. Most of what works is already in your kitchen or bathroom, and the list stays short on purpose — every extra product is another chance to damage the case.

    For the basic pass, grab a soft-bristled brush. An old toothbrush works, but check the bristles first: they should bend easily under your finger. The stiff kind is what left those streaks on my last case, so if yours feels rough, swap it for a makeup brush or a soft dish brush instead. You’ll also want a lint-free cloth — a microfiber cloth is ideal, but a clean cotton towel or kitchen paper works in a pinch. Skip paper towels here; they leave fine paper dust and can scratch the surface.

    For the solutions, keep a small bowl of warm water with a few drops of mild dish soap, a box of baking soda, and some plain white vinegar. Isopropyl alcohol at 70% or higher is optional, mainly for greasy residue, and we’ll cover when to use it later. Hydrogen peroxide stays in the last-resort section, so don’t open it yet.

    A few rules before anything touches the case. Take the phone out first — never soak or run the case under water while your phone is still inside, and don’t pour liquid directly onto the phone itself. If you’re using alcohol or peroxide, dab a tiny spot on an inner corner or edge first and wait a few minutes; if the plastic looks dull or cloudy there, stop. After every method, rinse or wipe the case and let it air-dry completely before you snap the phone back in. Trapped moisture inside a case is how people end up with a foggy screen or a sticky charging port, and that’s a mess you don’t want to fix later.

    Safe Household Methods to Try First

    Safe Household Methods to Try First

    MethodBest forHow harshNotes
    Warm soapy waterEveryday grease, sweat, light grimeGentlestSoak 5–10 min; stop here if the case looks clear
    Baking soda pasteMarks soap won’t liftMildly abrasiveDon’t press hard or scrub in circles
    Vinegar + baking soda soakSet-in grime in tight spotsMildSoft TPU/silicone: soak less time
    70%+ isopropyl alcoholStubborn grease after the soap washModerate, occasional onlySpot-test an inner edge first; caution on soft TPU/silicone
    3% hydrogen peroxide + sunLast resort onlyHarsh, mixed resultsOften temporary; soft cases are poor candidates

    Warm Soapy Water

    This is the everyday clean, and it handles most grease and sweat buildup on its own. Add a few drops of mild dish soap to a bowl of warm, not hot, water and let the case soak five to ten minutes. On my own clear case, the dirtiest spot was always around the charging port — that’s where pocket lint, sweat and hand oil collect first, so give that area extra attention with the soft brush. Scrub gently inside and out, working around corners and button edges, then rinse under cool water and dry with a lint-free cloth. If it looks clearer and feels less sticky, stop here — nothing stronger is needed.

    Baking Soda Paste

    For marks soap won’t lift, make a thick paste of baking soda and a little water, roughly three parts soda to one part water. Rub it on the stained spots with the soft brush, let it sit around ten minutes, then rinse well. Don’t press hard or scrub in circles; baking soda is mildly abrasive, and rough rubbing is how those fine streaks happen.

    Vinegar and Baking Soda Soak

    For really set-in grime, try the fizzing soak. Put the case in a small container, add a couple of spoons of baking soda, and pour in plain white vinegar until it covers the case. The bubbling helps loosen dirt in tight spots. Let it sit up to an hour or two — give soft TPU or silicone less time, since prolonged soaking can weaken them. Rinse thoroughly and air-dry before reattaching the phone.

    Afterward, look at the case in good light. Surface haze lifting off is a normal result; if the yellow tint looks unchanged after a proper clean, that’s permanent material change, not leftover dirt. Skip ahead to the replacement signs instead of escalating to harsher chemicals.

    Isopropyl Alcohol for Stubborn Grease

    If the case still feels sticky or greasy after the soap wash, especially around areas that touch your hands or face, alcohol is the next step. It cuts through oils soap leaves behind — sweat, hand lotion, sunscreen residue, that thin film that builds up on the back of the case over a day of pocket carry.

    Use 70% or higher isopropyl alcohol, but don’t pour it straight onto the case or soak the whole thing. Dampen a corner of your microfiber cloth instead, then wipe the outside, inside and edges lightly. Work in small sections, and let the alcohol evaporate on its own rather than rubbing it dry immediately. If you want to be cautious, rinse the case lightly with water afterward and dry it fully before putting the phone back in.

    The main caution here is material. Soft TPU and silicone absorb everything nearby, and repeated alcohol use can leave them dull, cloudy or even more sticky than before — the coating on these cases is thinner than people expect. Hard PC handles alcohol better, but it still shouldn’t get a full wipe-down every week. Do the spot test on an inner edge first, like we covered earlier: if the plastic looks hazier after a few minutes, stop and go back to soap and water.

    Treat this as an occasional grease cleanup, not your default wash. Once a month or after a particularly sweaty day is plenty; reaching for alcohol every time you notice a mark speeds up the very wear you’re trying to clean away. And if the case feels sticky again right after the alcohol dries, that usually means the material has started to break down, not that you need more cleaning.

    Hydrogen Peroxide and Sunlight: The Last Resort

    This is the method most people mean when they ask about bringing a yellowed clear case “back to life,” and I’d put it last for a reason. The process has a name in the plastic-restoration community — retrobrite — and it was developed for old electronics housings, game consoles and similar aged plastic, not really for thin phone cases. Results on a case are genuinely mixed: some users report a lighter tint for a few weeks, others see little change at all, and a few end up with a cloudier or more brittle shell.

    Here’s how people do it. Remove any electronics first. Use ordinary 3% household hydrogen peroxide — skip the stronger salon or industrial strengths. Submerge the case in it in a sealed container, or coat the surface and wrap it tightly in plastic wrap to keep it from drying out. Leave it in direct sunlight or under a UV lamp for a few hours up to a day, checking on it now and then. Rinse thoroughly with soap and water when you’re done. Wear gloves throughout; peroxide irritates skin, and the stronger concentrations burn.

    A few warnings before you consider it. The improvement, if any, is often temporary — the yellow can come back as the plastic keeps aging. It can also weaken or craze older, sun-damaged plastic, and soft TPU or silicone cases are poor candidates for this treatment. Most case brands and device manufacturers advise against bleach, peroxide or concentrated solvents on their products, so you’re doing this without any backing from the maker.

    I’d be honest here: for a phone case that has turned amber or brown through normal use, this is usually more effort than it’s worth. If the gentler methods didn’t clear it, the material has likely already changed, and a new case is the cleaner outcome than a week of peroxide soaking. We’ll cover the replacement signs next.

    Home Hacks That Actually Ruin Clear Cases

    A lot of household cleaning advice sounds clever until you try it on a thin clear case. These are the ones that leave permanent marks, and most of them I’d avoid entirely.

    ProductWhy people reach for itWhat it does to clear plasticVerdict
    ToothpasteFeels like a gentle whitenerFine abrasives grind permanent micro-scratches into clear plastic; streaks can’t be fixed at homeAvoid
    Bleach / strong whitenersHoping to lift deep yellowingBreaks down soft TPU/silicone, leaving it brittle, chalky or more discolored; doesn’t reverse chemical yellowingAvoid
    Acetone, nail polish remover, paint thinnerThinking it dissolves grimeDissolves or softens plastic: dull patches, softened frame, warped edges; on soft cases within secondsAvoid
    Metal scouring pads, steel wool, rough pot spongesTrying to scrub harderGrit scratches through the clear finish; the scratch pattern catches lightAvoid

    Toothpaste is the one I have firsthand experience with. It feels like a gentle whitener, but it contains fine abrasive particles meant to scrub tooth enamel — the same particles grind micro-scratches into clear plastic. I used it on my case with an old toothbrush: the stickiness lifted, and the streaks were already there to stay. Once the surface is scratched, polishing it out means removing a layer of plastic, which most people can’t do at home.

    Bleach and strong whiteners are another bad call. People reach for them hoping to lift deep yellowing, but chlorine bleach breaks down soft TPU and silicone over time, leaving the material brittle, chalky or more discolored than before. It also won’t reverse chemical yellowing, so there’s no upside — only damage.

    Acetone, nail polish remover and paint thinner dissolve plastics rather than clean them. A wipe that looks fine at first can leave a dull patch, soften the frame or warp the edges, and on a soft case the reaction can happen within seconds. Same story with metal scouring pads, steel wool or rough pot sponges: their grit scratches through the clear finish right away, and that scratch pattern catches light every time you look at the case.

    A simple rule: if a product is meant to strip, dissolve or abrade something else, don’t test it on your phone case. If after any cleaning the plastic feels rough, looks cloudy in patches, bends oddly or snaps when it used to flex, that damage is permanent — move on to checking whether it needs replacing.

    Getting Into Corners, Camera Cutouts and the Inside

    The part of a case that gets dirtiest is rarely the back you see every day. It’s the side pressed against your phone, plus the cutouts and seams where dust and oil settle out of reach of a quick wipe.

    Start with the inside. Take the case off and lay it flat, inner side up. The film there is mostly hand oil and sweat that transferred off your phone over weeks, and it often looks duller than the outside. Brush it gently with the soft brush or wipe it with the damp cloth, following the shape of the case rather than scrubbing back and forth. Don’t dig into any raised ridges or button covers; those flex and wear down faster than the main panel.

    For the openings, the charging port area is usually the worst spot, like it was on mine. Pocket lint and skin oil collect around that rim first, and a quick wipe over the back won’t touch it. Use the tip of the soft brush or a folded corner of the cloth to work around the camera ring, port edge and button gaps. A dampened cloth corner is better than a soaked one here — you want to lift the grime, not push moisture into the seam.

    Keep water away from the openings while you clean. Rinse the case under running water from the outside if needed, but don’t hold the port cutout under the stream, and never clean the phone itself with the case on. Afterward, shake out any trapped drops and let the case air-dry fully, inner side up, before you snap the phone back in. A case that goes back on damp traps moisture against the phone, and that’s how people end up with a foggy camera or a film on the screen.

    Signs It’s Time to Stop Cleaning and Replace the Case

    If you’ve run through the gentle methods once or twice and the tint hasn’t moved, you’re looking at material degradation, not leftover dirt. The yellowing here is a chemical change inside the polymer caused by UV light, heat and skin oils over time — it can’t be scrubbed or soaked away. We break down the science in our piece on why clear cases turn yellow; here it’s enough to know that once this stage hits, cleaning is only surface maintenance.

    Watch for these signs, and any one of them is a reasonable reason to stop trying to save the case. The color has moved past yellow to a brown or amber tint across the whole shell. The surface stays cloudy or hazy after a proper wash, rather than clearing up. You see fine cracks along the edges or around the camera cutout, or the rim has lifted and no longer snaps flush to the phone. The material feels brittle — it flexes less than it used to, or whitens and creases when you bend a corner. If the case has warped, loosened its grip or sits crooked on the phone, that’s another one.

    These aren’t just looks problems. A case that has dried out and cracked doesn’t wrap the phone the way it did when new; the corners and edges lose their shock-absorbing fit, which is the whole reason you put a case on in the first place. Keeping a worn shell around to save a few dollars usually means weaker protection exactly when you drop the phone.

    When it’s time, pick a replacement built to resist yellowing rather than another soft TPU shell that will repeat the cycle. Our roundup of the best clear cases covers hard polycarbonate and anti-yellowing options that stay clearer longer.

    How to Keep Your Clear Case Clear Longer

    Yellowing can’t be fully stopped — the chemistry keeps moving — but a few habits push it further down the calendar instead of letting it arrive in a few months.

    The biggest one is heat and sun. UV light and warmth break down soft plastic fastest, so don’t leave your phone on a sunlit windowsill, tucked under a beach towel, or resting on a hot car dashboard while you’re out. A phone that spends every afternoon in direct sun will yellow weeks earlier than one carried in a pocket or bag. Sweat and makeup residue do their part too; washing your hands before handling the phone sounds basic, but hand oil is one of the main things the case absorbs over time.

    Keep a light weekly clean with warm water and mild dish soap, using the soft cloth or brush from earlier. This removes oils before they soak in, and it’s gentler than reaching for alcohol every time you notice a mark. Skip the harsh chemicals on a regular basis; they strip the finish and speed up the wear they’re meant to prevent.

    The other lever is what you buy next time. Soft TPU and silicone are cheap and grippy, but they’re the materials that yellow fastest. Hard polycarbonate stays clearer longer, and some clear cases use UV-resistant coatings or stabilized polymers to resist discoloration. Our clear case roundup flags those options. If you want the full picture on why these materials age differently, our piece on clear case yellowing covers the science.

    FAQ

    1. Can you remove yellowing from a clear phone case?

      Sometimes. Surface grease, sweat and dirt wash off with soap and water, but yellowing baked into the material from UV light and heat usually can’t be reversed. If a gentle clean leaves the case still yellow or brownish, the material has degraded and a replacement is the practical fix.

      2. How do I make my yellow clear case clear again?

      Start with warm soapy water and a soft brush, then try baking soda paste for stubborn marks. A vinegar-and-baking-soda soak and diluted rubbing alcohol cover heavier grime. If the even, whole-case tint stays after these steps, no home method brings it back — the case needs replacing.

      3. Does vinegar remove yellowing on a phone case?

      Vinegar helps loosen surface grime and soap buildup, but it won’t reverse chemical yellowing in the plastic. A vinegar-and-baking-soda soak works best on greasy, set-in dirt; for an amber or brown tint caused by UV degradation, vinegar will do little or nothing.

      4. Can hydrogen peroxide remove yellowing on plastic?

      It can lighten some aged plastic in a process called retrobrite, but results on thin phone cases are mixed and often temporary. It can also make old, sun-damaged plastic brittle, and soft TPU or silicone don’t handle it well. Treat it as a last resort, not a reliable fix for a yellowed case.

      5. How long until a clear phone case turns yellow?

      It depends mostly on material and use. Soft TPU and silicone usually start showing yellow within months, especially in sun and heat; hard polycarbonate resists yellowing much longer. Direct sun, hot car interiors and heavy sweat speed it up, while regular cleaning and a UV-resistant case slow it down.

      6. My clear case has turned brown. Can I clean it?

      Try a gentle soap-and-water clean first; brown often means deeper material change than plain yellow. If the brown tint, cloudy surface or stiff, brittle feel stays after washing, the plastic has degraded past cleaning. Warped, cracked or lifted cases should be replaced rather than saved.

      7. Is rubbing alcohol safe on a clear phone case?

      70% or higher isopropyl alcohol can wipe stubborn grease off occasionally, but don’t soak the case or use it weekly. Soft TPU and silicone are more likely to turn cloudy or sticky from repeated alcohol; hard PC tolerates it better. Test a hidden inner edge first and let it air-dry fully.

      8. Can I use toothpaste or a magic eraser on a yellowed case?

      Avoid both. Toothpaste and magic erasers carry mild abrasives that scrub away dirt, but they also grind permanent micro-scratches into clear plastic — once scratched, the finish looks cloudy and can’t be fixed at home. Stick to soft brushes, microfiber cloths and liquid cleaners instead.
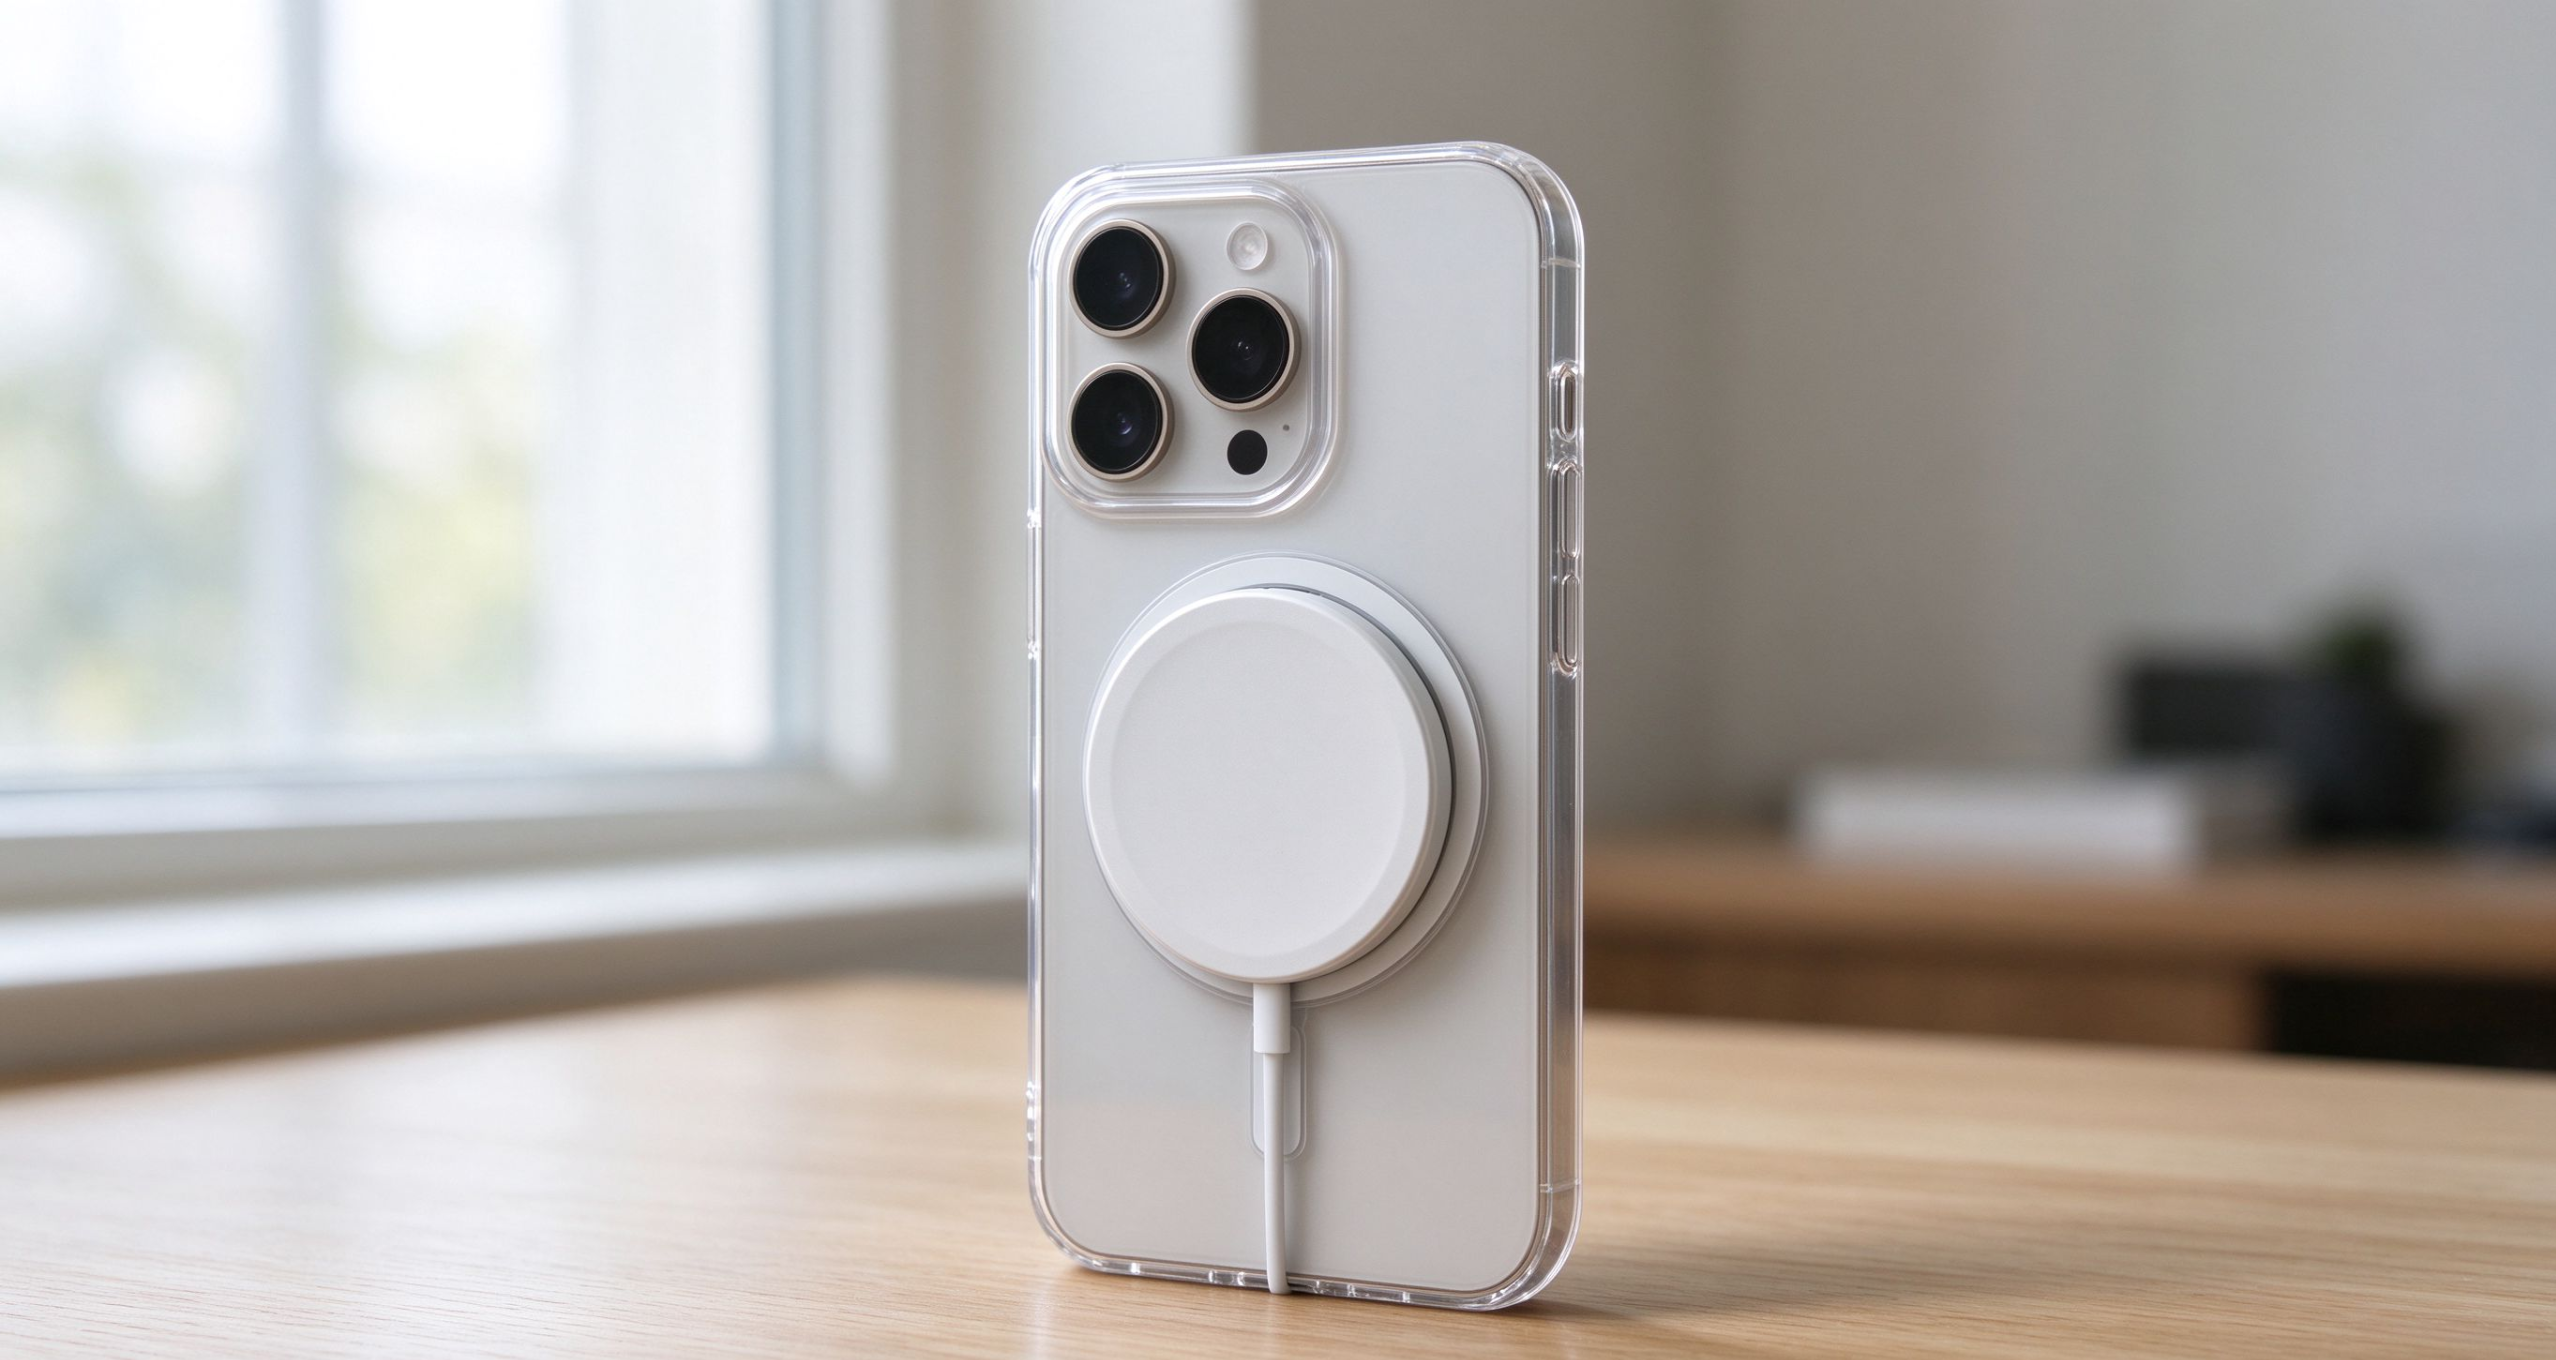
    1. How to Clean a Yellowed Clear Phone Case (And When to Just Replace It)

      I bought my first clear phone case a few months ago because I wanted to show off the natural color of my new phone. By month three, it looked like it had been sitting in a sunny window for a year — dull, foggy, and distinctly yellow.

      I went down the internet rabbit hole trying every “hack” I could find: baking soda, toothpaste scrubbing, hydrogen peroxide, even a white-vinegar soak. Some worked a little. Most did nothing. The toothpaste one actually left my case covered in tiny scratches that looked even worse than the yellowing.

      After wasting an entire Sunday on this, I figured out the hard way: not all “yellowing” is the same, and not every method is worth trying. Let me save you the same frustration.


      First: Diagnose What Kind of Yellowing You Have

      Before you reach for any cleaning supplies, spend 30 seconds figuring out what you’re actually dealing with. The wrong approach wastes time and can damage your case further.

      ① Feels oily, cloudy, fingerprint smudges visible → Just dirt. Dish soap and water will fix it completely.

      ② Even yellow tint across the whole case, still feels smooth → Surface-level yellowing from UV exposure and skin oils. Baking soda or a gentle hydrogen peroxide soak can help.

      ③ Edges (the soft TPU bumper) more yellow than the back, feels slightly brittle → Material degradation. No cleaning method will fix this. I explain exactly why this happens in my breakdown of why clear phone cases turn yellow.

      If you landed in category 3, you can stop reading here — the rest of this guide won’t help you. Skip to the last section where I tell you when it’s just better to buy a new case.

      Quick Method Comparison

      Here’s the short version before we dive into each method:

      MethodBest ForExpected ResultDifficultySafety
      Dish soap + warm waterEveryday grime, surface dirtRestores 80-90% of clarity⭐Safest option
      Baking soda scrubMild surface yellowingImproves 50-70% of appearance⭐⭐Safe for all materials
      Hydrogen peroxide soakModerate yellowingLightens 30-50%, won’t fully restore⭐⭐Use with caution
      White toothpasteNot recommendedDoes NOT fix yellowing, leaves micro-scratches⭐⭐Risk of permanently scuffing the surface
      Isopropyl alcohol wipeDisinfecting, cutting greaseNo effect on yellowing⭐Can damage coatings and TPU edges

      Now let’s walk through each one properly.

      Method 1: Dish Soap + Warm Water (Start Here)

      This should be your first step, every time. It’s the gentlest method, and it’s enough for 90% of people who just think their case is “yellowed” but actually just has months of hand oil and pocket lint built up.

      What you need:

      • Mild dish soap (not antibacterial with moisturizers — plain blue Dawn works fine)
      • Warm (not hot) water
      • A soft microfiber cloth or a very soft-bristled toothbrush
      • A towel for drying

      Steps:

      1. Take the case completely off your phone. This seems obvious but I’ve seen people try to wash it while it’s still on. Don’t do that.
      2. Mix a few drops of dish soap into a bowl of warm water.
      3. Dip your cloth or toothbrush in, and gently scrub the entire case — both inside and outside. Pay extra attention to the edges and corners where dust collects.
      4. Rinse thoroughly under warm running water until all soap residue is gone.
      5. Pat dry with a clean towel, then let it air dry completely for at least 30 minutes before putting your phone back in.

      My honest take: This won’t fix true yellowing, but you’d be surprised how many cases just needed a good wash. I thought my case was permanently yellowed until I did this — turns out half of the “yellow” was just months of invisible hand oil building up.

      Method 2: Baking Soda Scrub (For Mild Yellowing)

      If after washing the case still has a yellow tint, baking soda is your next step. It’s a mild abrasive that lifts surface discoloration without scratching the plastic.

      What you need:

      • Baking soda (regular kitchen baking soda, not the fancy kind)
      • A little water
      • A soft-bristled toothbrush
      • Warm water for rinsing

      Steps:

      1. Remove the case and rinse it under warm water to get the surface wet.
      2. Sprinkle a thin layer of baking soda directly onto the yellowed areas. You can also mix it with a few drops of water to make a thick paste if you prefer.
      3. Use the soft toothbrush to gently scrub in small circular motions. Don’t press hard — let the baking soda do the work. Scrub for about 2-3 minutes on the worst areas.
      4. Let the baking soda paste sit on the case for 10-15 minutes. This gives it time to lift the discoloration.
      5. Rinse thoroughly with warm water, making sure all baking soda is washed out of the corners and edges.
      6. Pat dry and air dry completely.

      My honest take: This improved my case noticeably — it went from a distinct yellow tint to a much paler, almost off-white color. It didn’t make it look brand new, but it bought me another month or two of use. This method works best on yellowing that’s only a few months old.

      Method 3: Hydrogen Peroxide Soak (For Stubborn Yellowing)

      If baking soda didn’t do enough, hydrogen peroxide is the “nuclear option” for home methods. It’s a mild bleaching agent, and it can lighten yellowed TPU. But it’s also the method most likely to cause damage if you’re not careful.

      Important disclaimer first: This works on surface-level UV discoloration. It will not reverse deep material degradation. If your case is in category 3 from the diagnostic section above, skip this — you’re just wasting peroxide.

      What you need:

      • 3% hydrogen peroxide (the regular brown bottle kind from any pharmacy — don’t use anything stronger)
      • A clear plastic container or bowl (something you don’t care about staining)
      • Warm water
      • Gloves (optional, but the peroxide can dry out your skin)

      Steps:

      1. Remove the case and give it a quick wash with dish soap first. You want to get all surface oil off before soaking.
      2. Place the case in your plastic container. Pour in enough hydrogen peroxide to completely submerge it. If your case floats, weigh it down with a small clean object.
      3. Optional: place the container in a sunny spot. The UV light from the sun plus the peroxide creates a stronger bleaching reaction. This is actually the trick that most “hacks” leave out.
      4. Let it soak. I’d start with 2 hours, then check progress. Some guides say overnight — but I’d avoid soaking longer than 4-6 hours at most, because prolonged exposure can weaken the TPU over time.
      5. Remove the case and rinse very thoroughly with warm water. Rinse inside and out, making sure no peroxide residue is left.
      6. Air dry completely.

      My honest take: This helped more than baking soda, but it still didn’t make my case fully clear. I’d say it lightened the yellow by about 40-50%. The case looked “less yellow” but still clearly aged. Worth trying if you’ve already committed to the case, but don’t expect a miracle.

      Safety notes:

      • Don’t use bleach. Chlorine bleach will destroy TPU and can make yellowing worse.
      • Don’t heat the peroxide or use a concentration higher than 3%.
      • Don’t soak cases with printed designs or coatings — the peroxide will strip those right off.

      What NOT to Do: 6 Mistakes That Make Yellowing Worse

      I’ve seen all of these recommended online. Don’t do them. I learned most of these the hard way.

      1. Don’t scrub with toothpaste. I tried this one myself — it seems harmless, right? Toothpaste is just mild abrasive, the internet says. But after two minutes of gentle scrubbing with a soft toothbrush, my case was covered in tiny micro-scratches all over the back. It didn’t remove the yellow at all, and now it looked foggy and scuffed on top of being yellow. I was more upset about the scratches than the original yellowing. Skip it.

      2. Don’t use rubbing alcohol as a soak. Alcohol will cut through oil and disinfect, but soaking a TPU case in isopropyl alcohol will turn the soft edges cloudy and hazy permanently. You can use a 70% alcohol wipe very lightly on the hard plastic back panel if you need to disinfect, but never submerge the whole case.

      3. Don’t use bleach. Chlorine bleach is too aggressive for phone case materials. It will not only fail to remove yellowing — it can actually accelerate the degradation process and make the case more brittle.

      4. Don’t use acetone or nail polish remover. This will literally dissolve TPU. Even a quick wipe can leave a permanently hazy, melted-looking spot on your case.

      5. Don’t use boiling water, the dishwasher, or a hairdryer. Heat warps and distorts plastic. You’ll end up with a warped case that doesn’t fit your phone anymore, on top of the yellowing.

      6. Don’t scrub hard with an abrasive sponge or stiff brush. Scratches on a clear case aren’t just ugly — they create tiny grooves that trap more dirt and oil, making the case yellow faster over time. Stick to soft brushes and microfiber cloths.

      Why Nothing I Tried Worked? It’s Time to Replace It

      Here’s the truth nobody tells you: most yellowed clear cases can’t be fully fixed.

      If you’ve tried all three methods above and your case still looks noticeably yellow, that’s not a cleaning failure — that’s the material reaching the end of its lifespan.

      TPU (the soft, flexible material used in most clear cases) breaks down from UV exposure, skin oils, and oxygen over time. The chemical changes happen at the molecular level inside the plastic. You can clean the surface all you want, but you can’t reverse that internal degradation.

      [Outbound link: add hyperlink on “TPU” to https://en.wikipedia.org/wiki/Thermoplastic_polyurethane]

      At this point, you have two options:

      1. Keep using a case that looks yellowed (totally fine if you don’t care about looks)
      2. Buy a new one — ideally one that’s designed to resist yellowing

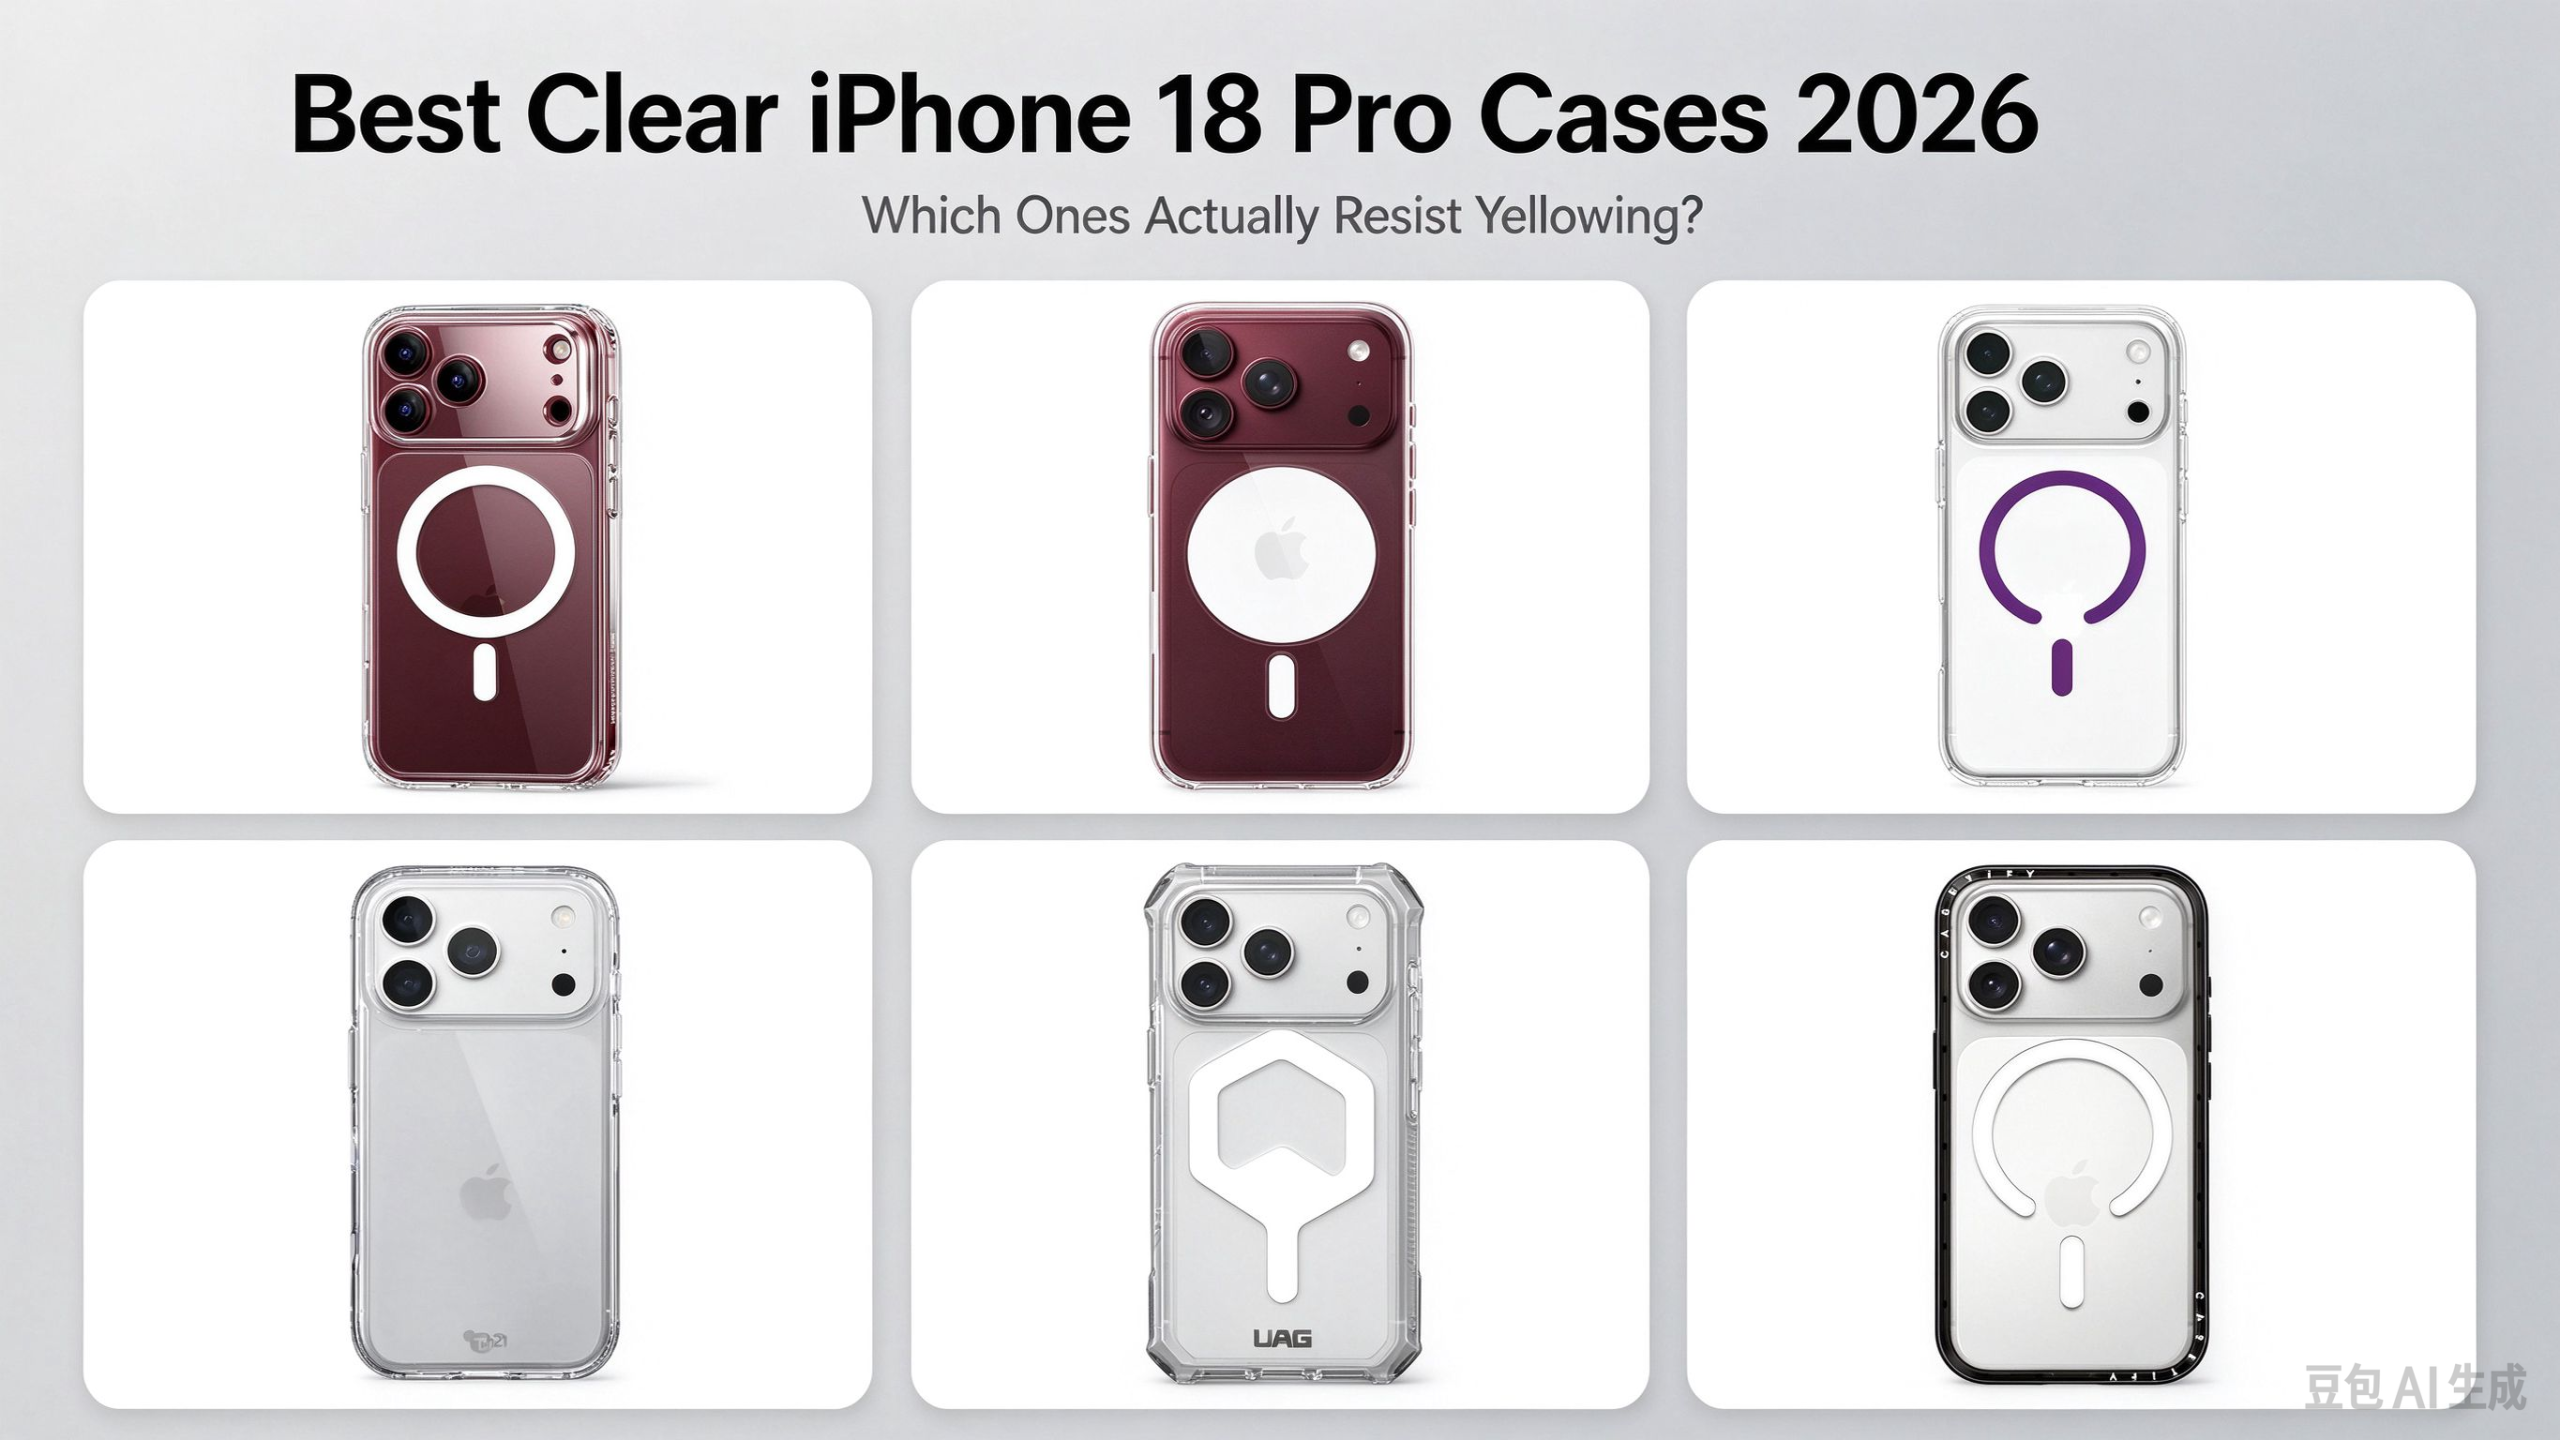
      If you’re going to replace it anyway, you might as well get one that’s going to last longer. I tested six popular clear cases for iPhone 18 series and tracked which ones stayed clear the longest. You can see the full roundup of the best clear iPhone 18 Pro cases there — the top picks use harder polycarbonate backs with anti-yellowing coatings that hold up much better than cheap TPU-only cases.

      Quick Tips to Prevent Yellowing in the First Place

      Cleaning is reactive — prevention is easier. Here are the small habits that will make your next clear case last longer:

      • Take it off and wash it with soap every 2-3 weeks. This removes the skin oils that accelerate yellowing before they can react with the material.
      • Don’t leave your phone in direct sunlight for hours. Your car’s dashboard on a hot day is the #1 way to age a clear case in weeks.
      • Wipe the inside of the case too. Dust and pocket lint get trapped between the case and your phone, and they trap moisture against the plastic.
      • Don’t set your phone screen-down on rough surfaces. Scratches aren’t just ugly — they give UV rays and oil more places to penetrate the material.
      • If you’re buying a new one, look for “anti-yellowing” or “UV-resistant” in the product specs. Cases with these coatings cost a few dollars more but last months longer. I’ve tested a few of the best ones in my roundup of clear iPhone 18 cases if you want a head start.

      (I’m planning a deeper guide on how to prevent clear case yellowing soon — I’ll link it here once it’s up.)

      FAQ

      Q: Can you reverse yellowing on a clear phone case?

      Partially, yes — but only for surface-level yellowing from UV exposure and oil buildup. Once the TPU material itself has chemically degraded (usually after 6+ months), the yellowing is permanent and no cleaning method will fully restore it.

      Q: Does hydrogen peroxide really work on yellowed phone cases?

      It can lighten moderate yellowing by about 30-50%, but it won’t make the case look brand new. It works best on younger yellowing (under 3-4 months old). Don’t soak for more than a few hours, as prolonged exposure can weaken the plastic.

      Q: How long does it take for a clear case to turn yellow?

      It depends on the material and how you use it. Cheap TPU cases can start yellowing in as little as 2-3 months, especially if you use your phone outside a lot or leave it in hot cars. Higher-quality polycarbonate cases with anti-yellowing coatings can stay clear for 6-12 months. I break down the material science in my article on why clear phone cases turn yellow.

      Q: Is it worth cleaning a yellowed case or just buying a new one?

      If the case cost you under $15 and it’s been more than 6 months old, just buy a new one. The time you spend cleaning it isn’t worth the marginal improvement. If it’s a nicer case ($30+) or it’s only a few months old, try the baking soda method first — it’s cheap and takes 15 minutes.

      Q: Does toothpaste work to clean yellowed clear cases?

      No — I tried this one myself and it was the biggest waste of time. It didn’t remove any of the yellowing, and the mild abrasives in toothpaste left my whole case covered in tiny micro-scratches that made it look foggy and scuffed. You’re better off using baking soda, which is less abrasive and actually does something for surface yellowing. Just skip the toothpaste hack entirely.

      Disclaimer

      This article contains affiliate links, which means I may earn a small commission if you click through and make a purchase — at no extra cost to you. As an Amazon Associate I earn from qualifying purchases. This helps me keep this site running and testing more products for you. All opinions in this article are my own, based on my own testing experience.

    2. Does MagSafe Work Through a Case? (Honest Answer for Every Case Type)

      Does MagSafe Work Through a Case? (Honest Answer for Every Case Type)

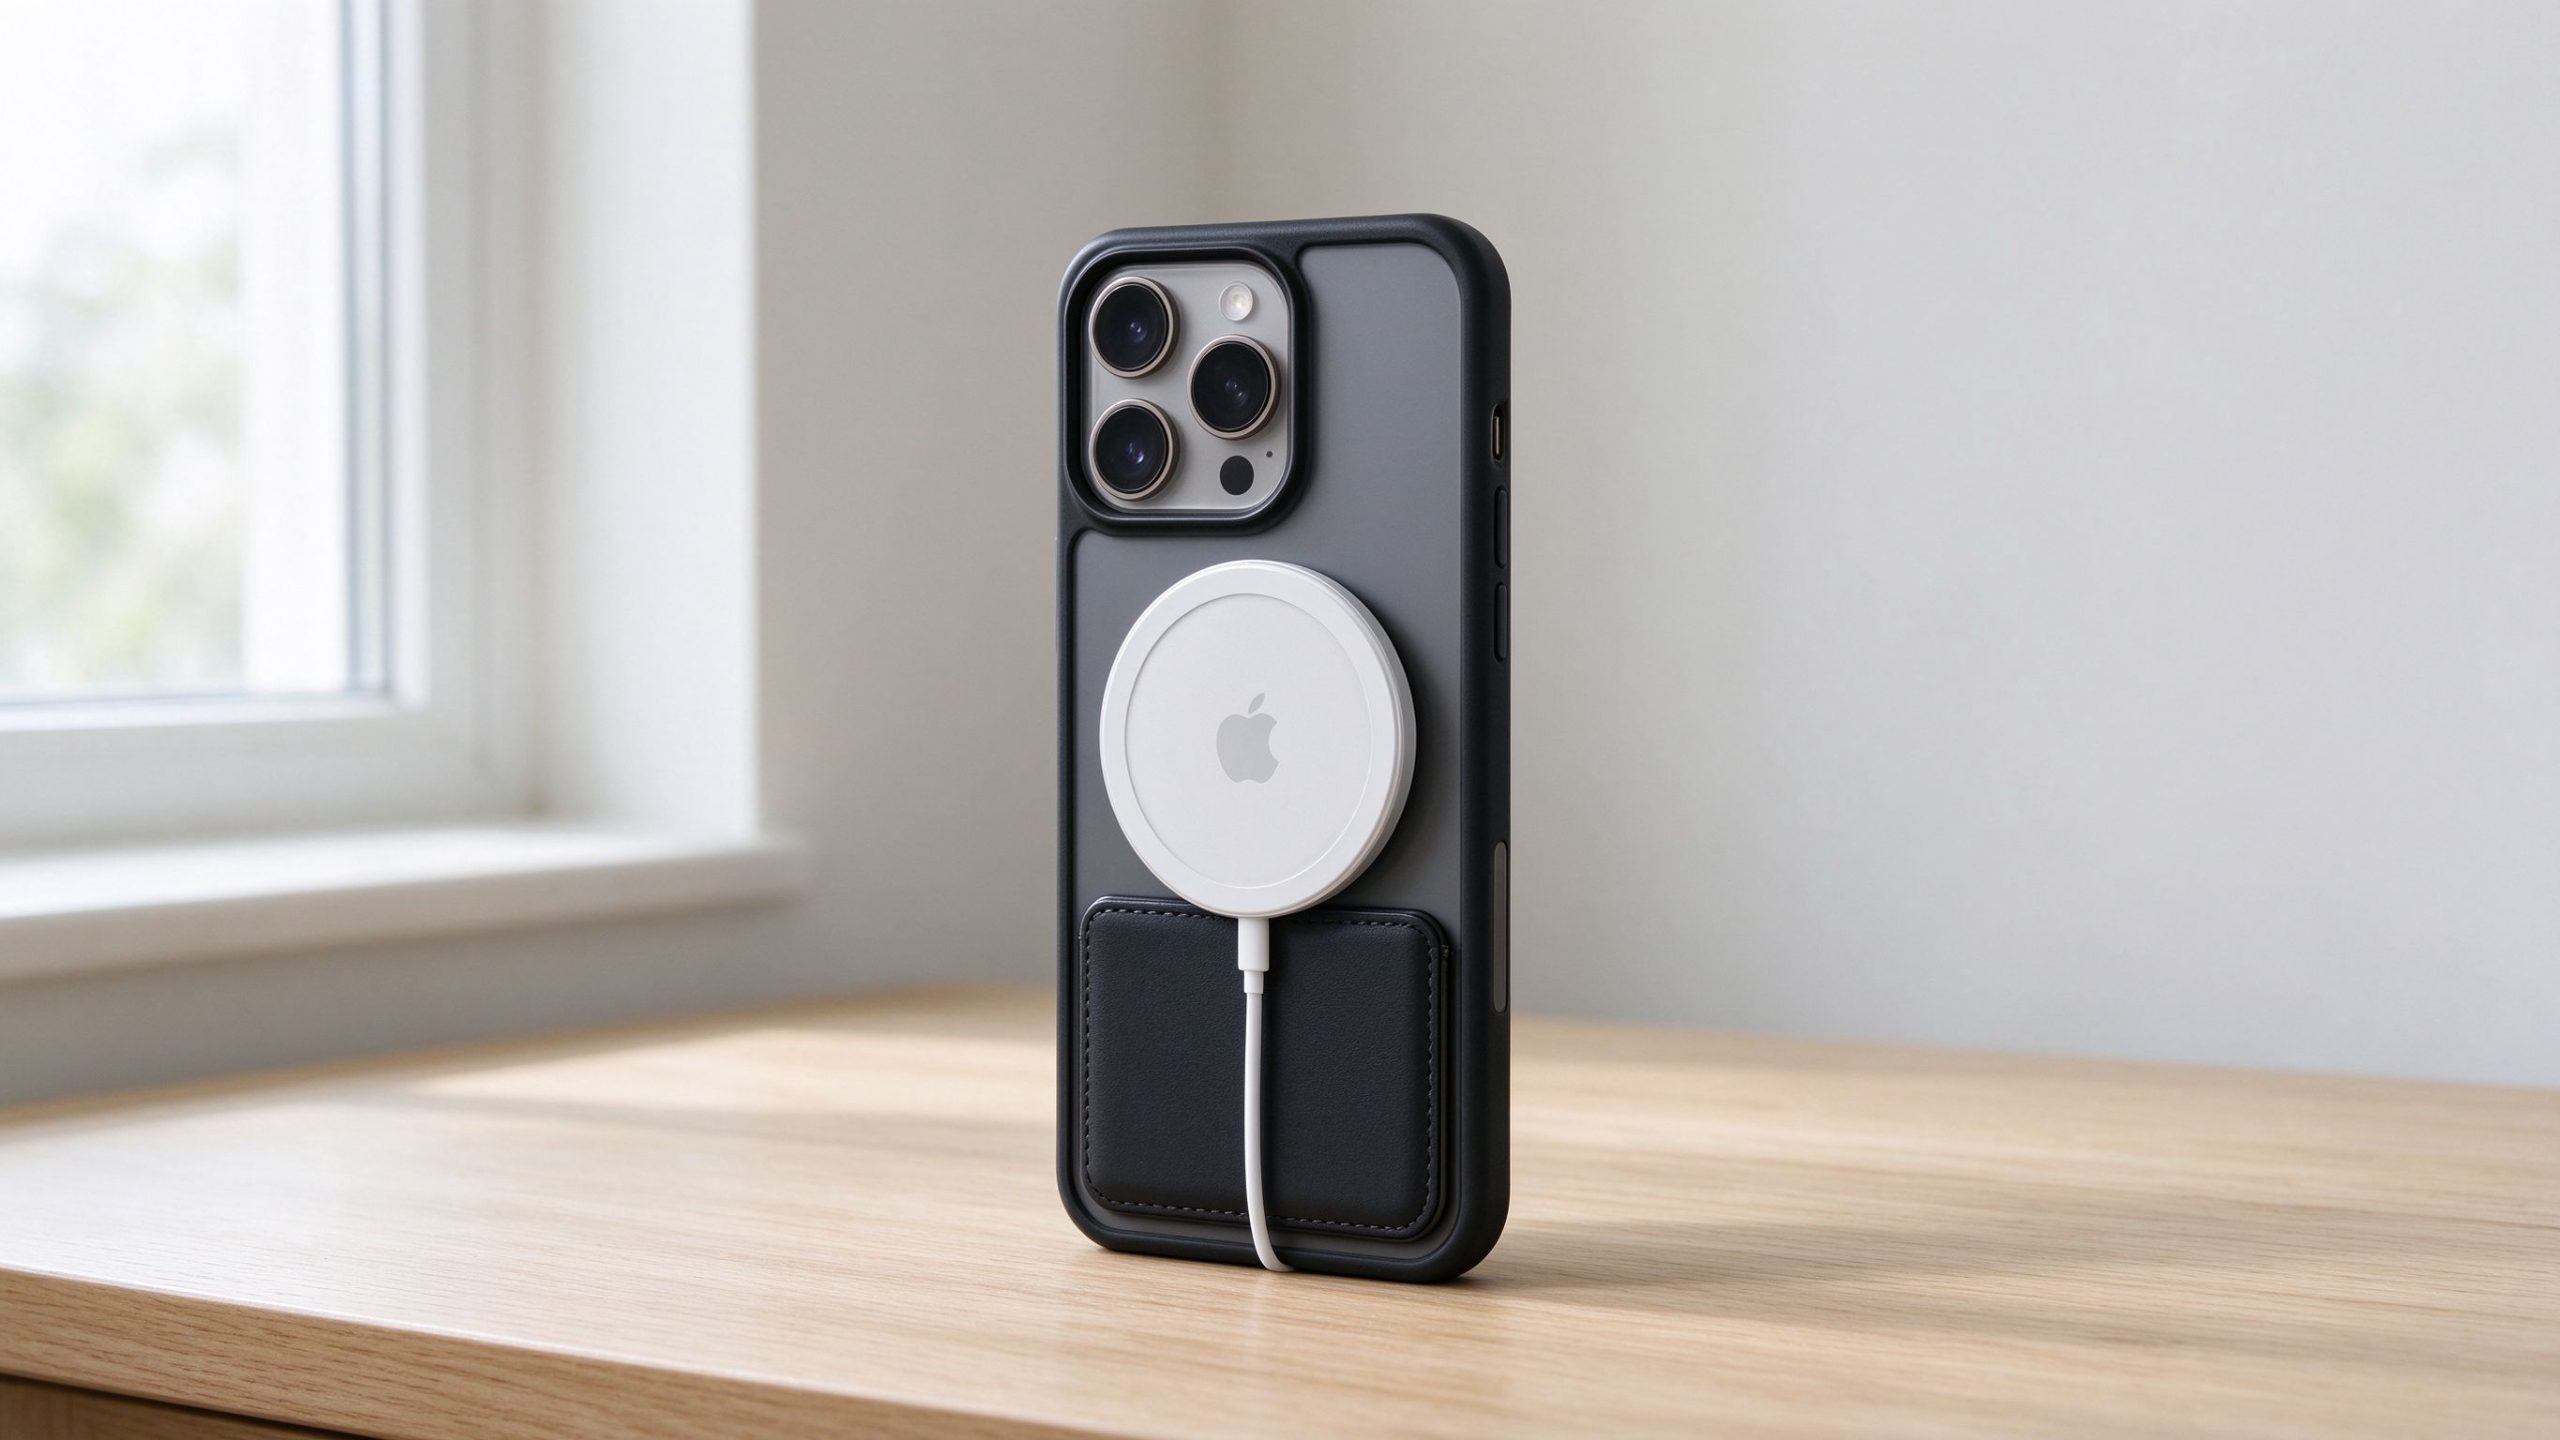
      Does MagSafe work through a phone case? Close up of iPhone with MagSafe charger on a clear case

      Yes, MagSafe works through a phone case — but how well it works depends on how thick your case is and what it’s made of.

      If you have a thin, regular case (under about 2mm), MagSafe will charge your phone just fine. The magnets might feel a little weaker than they do with no case on, but the charger will still snap into place and charge at normal speed.

      The problems start when your case gets thicker or made of the wrong stuff. A bulky rugged case like an OtterBox Defender? The magnets probably won’t reach through, and the charger won’t stay on. A case with a metal plate inside? That blocks the magnetic field completely.

      I get asked this all the time: “I just bought a new case, will my MagSafe charger still work?” The answer isn’t a simple yes or no — it depends on what you bought. Let me break down exactly which cases work, which don’t, and what to do if your case is too thick.

      How MagSafe Works Through a Case

      Diagram showing how MagSafe magnets work through a phone case

      To understand why some cases work and others don’t, you need to know how MagSafe actually works under the hood.

      Inside your iPhone, there’s a ring of magnets positioned around the charging coil. When you bring a MagSafe charger near, those magnets pull the charger into perfect alignment — the coil in the phone lines up exactly with the coil in the puck, and charging starts at full speed.

      Now, when you put a case on, you’re adding a layer of material between the phone’s magnets and the charger’s magnets. It’s like standing further away from someone — the farther apart you are, the weaker the connection.

      With a thin case (1-2mm), the distance is small enough that the magnets still pull hard enough to snap the charger on. You might feel it click slightly less firmly, but it still works.

      Add more thickness — say 3mm, 4mm, or more — and the magnets can’t reach. The charger might sit on the back of the phone, but it won’t snap into place. Worse, even if it does stay on, the charging coils might not line up perfectly, so you end up charging slower or not at all.

      That’s why the official MagSafe cases have their own built-in magnet ring — it extends the phone’s magnets right through the case, so you get that strong snap-on feel no matter how thick the case is.

      The Thickness Limit: How Thick Is Too Thick?

      MagSafe case thickness comparison: thin case vs thick rugged case

      Okay, so what’s the actual cutoff? At what point does a case go from “works fine” to “MagSafe gives up”?

      Based on what I’ve seen from real user reports and manufacturer specs, the magic number is around 3mm.

      • Under 2mm: No problems at all. The magnets snap on strong, charging works at full speed. Most thin cases and Apple’s own silicone/clear cases fall in this range.
      • 2mm to 3mm: Still works, but you’ll notice the magnet feels weaker. The charger might pop off if you bump the phone a little too hard. Charging speed should still be fine, just the snap-on feel isn’t as firm.
      • 3mm to 5mm: This is the gray area. Some cases in this range still work, some don’t. It depends on the material — TPU and plastic let magnetic fields through better than thick rubber. You might get weak charging or the charger falling off constantly.
      • Over 5mm: Almost certainly won’t work. The magnets can’t reach through that much material. You’ll be taking your case off every time you want to charge.

      Here’s a quick way to test: put your phone in the case, hold the MagSafe charger near the back, and see if it snaps on. If you feel that firm “click,” you’re good. If it just sits there loosely or falls off immediately, your case is too thick.

      And remember — thickness isn’t the only factor. The material matters too, which we’ll get into next.

      Thin / Clear Cases: Works Perfectly

      If you have a thin case or a clear case, you’re in the clear — MagSafe will work just fine.

      Most thin cases are around 1mm to 1.5mm thick. That’s well under the 2mm threshold, so the magnets have no trouble reaching through. You’ll get that satisfying snap-on feel, and charging works at full speed.

      Clear cases are usually made of TPU or hard plastic, which both let magnetic fields pass through easily. You don’t lose any charging speed, and the wallet, car mount, and battery pack all attach normally.

      One thing to watch out for: some cheap clear cases have a metal ring or a decorative metal plate on the back (for grip or for magnetic car mounts). If your clear case has any metal on it, that’s going to block MagSafe. But 99% of plain clear cases don’t have this — it’s only the ones marketed as “magnetic ready” or with built-in metal plates that cause problems.

      If you bought a cheap $10 clear case from Amazon or somewhere, you can pretty much guarantee MagSafe will work through it. The only exception is if the case is weirdly thick — but most budget clear cases are thin.

      The bottom line: if your case feels thin and flexible when you hold it, MagSafe is going to work. No surprises here.

      Silicone Cases: Works, But the Magnet Feels Weaker

      Silicone cases are where things get a little tricky.

      If you have an Apple silicone case or any soft silicone case, MagSafe will still charge your phone — but you might notice the magnet doesn’t feel as strong as it does with a plastic case.

      Why? Silicone is softer and slightly thicker than hard plastic. It also has a little more “give” — when the charger snaps on, the silicone compresses a tiny bit, which means the magnets aren’t sitting as close together as they would on a hard shell.

      The result: the charger still charges fine, but it feels less “locked in.” If you pull the phone off a car mount, for example, the charger might come off with the phone instead of staying on the mount. Same thing with a wallet — it might slide around a little more.

      The good news: charging speed isn’t really affected. The coils still line up, electricity still flows, your phone still charges. You just lose a bit of that firm snap-on confidence.

      If you really want the strongest magnetic feel with a silicone case, you have two options:

      1. Buy an official Apple MagSafe silicone case (it has built-in magnets that extend right through the silicone)
      2. Stick a third-party magnetic ring on the outside of your case

      For most people, the slightly weaker magnet on a regular silicone case isn’t a dealbreaker. It still works — it just feels a little looser.

      Rugged Cases Like OtterBox: Probably Not

      Okay, let’s talk about the big one: rugged protective cases. If you have something like an OtterBox Defender, Symmetry, or Commuter, you’ve probably already noticed that MagSafe doesn’t work great.

      Here’s the thing: rugged cases are built for drop protection, not for thinness. A typical OtterBox Defender is 4-5mm thick — way past the 3mm cutoff we talked about earlier. The magnets inside your iPhone simply can’t reach through that much material.

      What happens in practice: you try to snap the MagSafe charger on, and it kind of sticks for a second, but then falls off. Or it stays on loosely, but charging is super slow because the coils aren’t aligned.

      The good news: OtterBox and other rugged case brands now make MagSafe-compatible versions of their popular cases. These have a built-in magnet ring inside the case itself, so you get the strong snap-on feel even with the thick, rugged design.

      But here’s the catch: the regular (non-MagSafe) versions of OtterBox cases? MagSafe basically doesn’t work. You’ll either need to:

      1. Buy the MagSafe version of the case (usually $10-15 more expensive)
      2. Stick an external magnetic ring on the back of your existing case
      3. Take the case off every time you want to charge wirelessly

      If you’re someone who drops your phone a lot and needs a rugged case, the MagSafe-compatible version is worth the extra money. Otherwise you’ll be frustrated every single time you try to charge.

      Leather Cases: Weak Magnet, Slower Charging

      Leather cases are another one where MagSafe works, but not great.

      Most leather cases are around 2-3mm thick — right in that gray area we talked about. The leather itself isn’t super thick, but the layers underneath (the frame, the lining, the adhesive) add up.

      What you’ll notice: the charger snaps on, but it feels weak. If you pick up your phone by the charger, the phone might slide off. Car mounts and wallets feel less secure too — like they could fall off if you hit a bump.

      Charging speed also takes a small hit. Leather isn’t as transparent to magnetic fields as plastic or TPU. Most people won’t notice the difference day to day, but if you put a speed meter on it, you’re probably looking at 10-15% slower charging than you’d get with a thin plastic case.

      The other thing about leather cases: over time, the leather stretches and wears in. The more broken-in the case gets, the looser the magnet feels. It’s not a huge problem, but it’s something to keep in mind if you drop a lot of money on a nice leather case.

      If you love the look and feel of leather, it’s still worth it — just know that MagSafe won’t feel as tight as it does on a thin plastic case. And if you’re planning to use a MagSafe wallet or car mount every day, definitely go for a case that has built-in MagSafe magnets.

      Metal or Magnetic Plates: Stop Using Them

      Here’s where things go from “works but feels weak” to “doesn’t work at all.”

      If your case has any metal in it — a metal back, a metal plate, a metal ring — MagSafe is not going to work. At all.

      Why? Magnetic fields can’t pass through metal. It’s like trying to see through a brick wall. The magnets inside your iPhone can’t reach the charger, the coils don’t line up, and nothing happens. Worse, if you try to force it, the metal plate heats up because it’s absorbing all that magnetic energy. That’s not just bad for charging — it’s actually a fire risk.

      You see this most often with two types of cases:

      1. Cases with built-in metal plates for car mounts — those thin metal rectangles that stick to the back of your case so you can use a magnetic car mount. If you have one of these, you need to take it off before using MagSafe.
      2. Metal-backed cases — like aluminum or metal frame cases. These look cool, but they completely block wireless charging of any kind.

      The other thing to watch out for: popSockets or other phone grips that have metal bases. If your popsocket is centered right where the MagSafe charger goes, it’s going to block charging.

      The rule is simple: if there’s metal between your phone and the MagSafe charger, take it off. Don’t try to work around it — it’s not worth the risk.

      Do You Even Need a MagSafe Case?

      Here’s the question everyone actually wants to ask: do I need to buy a special MagSafe case, or can I just use my regular case?

      Short answer: no, you don’t need a MagSafe case to use MagSafe charging.

      Your iPhone already has magnets built into it. If you have a thin, regular case (under 2mm), MagSafe charging will work fine. The charger will snap on, your phone will charge, everything works. You don’t need to run out and buy a new case just for MagSafe.

      But here’s what you do get with a MagSafe case:

      • Stronger snap-on feel — the built-in magnet ring extends right through the case, so the charger clicks in firmly
      • Accessories work better — wallets, car mounts, and battery packs all attach more securely
      • No guessing — you know it’s going to work, no matter what

      So who needs a MagSafe case?

      • If you use a thick case (over 2mm) and want MagSafe to work → yes, buy one
      • If you plan to use MagSafe wallets or car mounts every day → yes, worth it
      • If you just want wireless charging and have a thin case → no, save your money

      Most people fall into the second category. You don’t need to upgrade your whole case setup just for MagSafe. But if you want the full experience — the strong snap, the wallet, the car mount — a MagSafe case makes it all work better.

      DIY: Turn Any Case Into a MagSafe Case

      Here’s the cheap hack nobody tells you about: you don’t need to buy a $50 MagSafe case to get the magnetic snap-on feel.

      You can buy a thin metal magnetic ring online for $5-10, stick it to the back of your existing case, and boom — you’ve got MagSafe.

      How it works: these rings are thin, flat metal discs with 3M adhesive on one side. You peel off the backing, center it over your phone’s charging coil (most kits come with an alignment guide), and press it on. That’s it. Now any MagSafe charger, wallet, or car mount will snap onto your case.

      The pros:

      • Super cheap — way cheaper than buying a whole new MagSafe case
      • Works with any case, even thick rugged ones
      • Easy to install, no tools needed

      The cons:

      • No on-screen animation (the ring is just metal, it doesn’t talk to your phone like Apple’s official magnets do)
      • The magnet strength depends on the quality of the ring — cheap ones feel weak, better ones are close to official
      • If you put it on a silicone or textured case, the adhesive might not stick well long-term

      If you have a case you love and don’t want to replace, this is the best way to get MagSafe without spending a lot. Just make sure you center it correctly — if it’s off by even a little, charging speed drops.

      Final Verdict: What to Do If Your Case Doesn’t Work

      So, putting it all together — what should you actually do if your current case doesn’t play nice with MagSafe?

      It depends on your situation:

      If you have a thin case and it already works great: Don’t change anything. You’re already getting the benefit of MagSafe without spending extra money. Just keep using what you have.

      If you have a mid-thickness case (2-3mm) and the magnet feels weak: Try a $5-10 magnetic ring sticker first. It’s the cheapest fix, and it’ll probably give you the strong snap-on feel you want. No need to buy a whole new case.

      If you have a thick rugged case like an OtterBox and MagSafe doesn’t work at all: You’ve got two options. Either buy the MagSafe-compatible version of your case (if one exists), or stick a magnetic ring on the back. The ring is cheaper, but the official MagSafe version feels better.

      If you’re buying a new case from scratch: Just buy a MagSafe case. The extra $10-15 is worth it for the strong magnet and the ability to use wallets and car mounts.

      And if you’re still on the fence about whether MagSafe is even worth using at all, I broke down the pros and cons in detail here — that might help you decide if it’s worth the hassle.

      At the end of the day, MagSafe isn’t for every case. But most people can make it work with either a cheap sticker or a reasonably priced MagSafe case.

      Frequently Asked Questions

      Is MagSafe slower through a case?

      A little, but not much. Thin cases (under 2mm) barely affect charging speed. Thicker cases can slow it down by 10-15% because the coils aren’t perfectly aligned. Metal or magnetic plates will slow it way down or stop charging entirely.

      Do I need a special case for MagSafe?

      No, you don’t. Your iPhone has built-in magnets that work through thin cases. But if you have a thick case or want stronger magnet feel, a MagSafe case with built-in magnets makes the experience much better.

      Can I use MagSafe with any case?

      Not any case. Thin plastic and silicone cases work fine. Thick rugged cases (over 3mm) usually block the magnets. Metal-backed cases block it completely. If your case has a metal plate, take it off before using MagSafe.

      How thick can a case be for MagSafe?

      The sweet spot is under 2mm. Up to 3mm it still works, but the magnet feels weaker. Past 5mm, the magnets can’t reach through at all. Material matters too — plastic works better than thick rubber.

      Does MagSafe work with OtterBox?

      Only the MagSafe-compatible versions. Regular OtterBox cases are too thick (4-5mm) for the magnets to reach through. Look for the “MagSafe” in the product name, or stick a magnetic ring on the back.

      Can I add MagSafe to any case?

      Yes, you can. Buy a $5-10 magnetic ring sticker, center it over your phone’s charging coil, and stick it on the back of your case. It won’t trigger the on-screen animation, but chargers and accessories will snap on normally.

      Disclosure: This post may contain affiliate links, meaning we may earn a small commission if you buy something through our links, at no extra cost to you. We only recommend products we’ve researched and believe in.

    3. Is MagSafe Worth It? Honest Breakdown for iPhone Users

      Is MagSafe Worth It? Honest Breakdown for iPhone Users

      If you’ve bought an iPhone in the last few years, you’ve probably seen that little ring of magnets inside the back. Apple calls it MagSafe, and they want you to buy into the whole ecosystem — chargers, wallets, car mounts, battery packs.

      I was skeptical at first. It seemed like just another way to get people to spend more money on Apple accessories. So I dug into what real users are saying, tested a few popular options, and put together this honest breakdown — no sponsored nonsense, just what it’s actually like day to day.

      What Is MagSafe, Exactly?

      MagSafe is a ring of magnets built into the back of every iPhone 12 and newer. It lines up with compatible accessories — a charger puck, a wallet, a battery pack — and snaps them into place automatically.

      The idea is simple: instead of fumbling to align a wireless charger or slipping a card into a flimsy slot, things just click. Apple built in a specific magnet arrangement so accessories know exactly where they are, and they charge at full speed instead of the slower wireless charging you get with random Qi pads.

      How Does MagSafe Actually Work?

      Diagram showing MagSafe magnet ring inside an iPhone and how the charger aligns

      Under the glass back of your iPhone, there’s a circular array of magnets arranged in a ring. When you bring a MagSafe charger near, the magnets pull it into perfect alignment — you don’t have to aim it like you do with regular wireless charging.

      That alignment matters because the charging coil inside has to line up with the coil in the phone for full-speed charging. With regular Qi chargers, if you’re off by even a little, you drop to slower speeds. With MagSafe, the magnets guarantee perfect alignment every time, so you get the fastest charging your iPhone supports (up to 15W with Apple’s official charger).

      There’s also a second set of magnets that talks to accessories using NFC, so the phone knows what you attached — whether it’s a wallet, a battery pack, or a charger.

      The Pros: What Makes MagSafe Actually Good

      Charging in the dark without waking up

      This sounds small, but it’s the thing people notice most. Before MagSafe, you’d wake up at 3 a.m. to grab your phone, fumble in the dark trying to find the charging cable, and end up turning on a light just to plug it in. That light kills your sleep rhythm.

      With MagSafe, you just hold the charger puck near the back of the phone and it snaps on. No lights, no fumbling. You can do it half-asleep.

      Your phone stays where you put it

      A lot of people like keeping their phone propped up on the nightstand so they can see notifications without picking it up. Before, it’d slide off or you’d have to prop it against something. With a MagSafe stand, it clicks into place and stays there.

      There’s something weirdly reassuring about being able to glance over and see your screen at night. I know it sounds silly, but it’s the kind of small thing that makes a difference every single day.

      Battery packs that don’t need cables

      This is the sleeper hit. I used to carry a power bank everywhere, and half the time I’d bring it but forget the cable. Useless.

      With a MagSafe battery pack, you just slap it on the back. No cable needed. And if you get a thin one, it doesn’t get in the way when you’re using the phone — you can charge and scroll at the same time without sitting next to a wall outlet.

      If you’re glued to your phone all day (and let’s be real, most of us are), being able to top up wherever you are, without hunting for an outlet, is genuinely useful.

      Wallets and car mounts that just work

      The wallet is basic — it holds 2-3 cards, snaps on the back of your phone. No more digging through pockets.

      But the car mount is where MagSafe really shines. Once you set your mount angle the way you like it, you just snap your phone on every time. No more adjusting it every single drive. You get in the car, it’s there, it’s positioned right. Done.

      The Cons: What Makes MagSafe Frustrating

      It’s expensive

      This is the obvious one. Apple’s own MagSafe charger is $39. A MagSafe case is another $50-60. A wallet is $59. A battery pack is $99. It adds up fast.

      And here’s the thing — you don’t need all of it. The charger alone is fine. But Apple designed it so you’ll want the whole ecosystem.

      Thick or heavy accessories don’t stay on

      Here’s a real problem: if you buy a heavier MagSafe battery pack or a thick wallet, the magnet can struggle. Pick up the phone a certain way, move it around, and it’ll pop off.

      The magnet is strong enough for thin, light accessories. But a bulky 10,000mAh battery pack? It’s not glued on. You’ll feel it shifting. Move your phone a little too fast and it disconnects — charging stops mid-way.

      It gets warm

      Wireless charging generates heat, and MagSafe is no exception. When you’re charging fast, the phone and the puck get noticeably warm. If you’re using the phone while charging (navigation in the car, for example), it’ll get hotter.

      It’s not dangerous — Apple throttles charging if it gets too hot. But it’s slower than plugging in, and you’ll feel it on your hands.

      Quick tip: if you charge near an open window or a fan, the heat dissipates faster and it doesn’t get as hot.

      The accessories lock you into the ecosystem

      This is the Apple tax. If you buy a MagSafe wallet from a third party, it might not snap on as strong. If you want a battery pack that charges at full speed, you’re basically looking at Apple or a handful of certified brands.

      It’s not a dealbreaker, but it’s annoying that a $15 generic wireless charger works with any phone, while MagSafe accessories cost more and don’t play well with non-MagSafe gear.

      Do You Actually Need a MagSafe Case?

      Short answer: no, but it helps.

      If you have an iPhone 12 or newer, the magnets are built into the phone itself. You can use a MagSafe charger with no case at all, or with any thin case.

      But here’s the catch: thick rugged cases (like OtterBox-style) break the magnetic connection. The magnets can’t reach through 3mm of rubber. So if you have a heavy-duty case, you either need to take it off every time you charge, or get a case with built-in MagSafe magnets.

      A MagSafe case adds a thin magnet ring to the case itself, so you keep the strong snap-on feel even with a protective case. It’s not essential, but if you use MagSafe accessories regularly, it makes the experience way better.

      MagSafe vs. Regular Case: What’s the Difference?

      Comparison table of MagSafe case vs regular case across key features

      People ask this all the time. Let’s break it down:

      The tradeoff is simple: MagSafe cases cost a bit more and are slightly thicker, but they unlock the whole accessory ecosystem. If you just want basic protection and don’t care about magnetic accessories, a regular case is fine.

      The Cheap Alternative: You Don’t Have to Buy MagSafe

      Here’s a secret nobody tells you: if you don’t want to spend $50 on a MagSafe case, there’s a cheap workaround.

      You can get silicone suction pads (the kind with those little grippy dots on both sides) and stick one to the back of your phone case. Then you can press your phone onto any smooth surface — a bathroom mirror, kitchen tile, a glass shower door. It holds your phone hands-free while you follow a recipe or take a video call.

      It’s not the same as MagSafe, and it won’t charge your phone. But if you just want to stick your phone on a wall sometimes, it works and costs almost nothing.

      Who Should Skip MagSafe?

      Let’s be real — MagSafe isn’t for everyone.

      Skip it if:

      • You always plug in with a cable and don’t care about wireless charging
      • You use a super thick rugged case and don’t want to switch
      • You hate spending money on Apple accessories
      • You already have a wireless charger that works fine for you

      MagSafe is a convenience upgrade, not a necessity. If you’re happy with how you charge your phone now, there’s no urgent reason to change.

      Who Should Buy Into MagSafe?

      On the other hand, if any of these sound like you, it’s worth it:

      • You hate fumbling with charging cables in the dark
      • You’re always on your phone and need to top up without an outlet
      • You use your phone for navigation in the car
      • You want a simple way to carry 2-3 cards without a wallet
      • You like the idea of snapping your phone on a stand and having it just work

      It’s the small daily conveniences that add up. After a few weeks, you stop noticing the magnets and start noticing how annoying regular charging used to be.

      Our Top Picks: What Actually Works

      I tested a few popular options to see what’s worth buying and what’s not. Here are the honest picks — including the complaints real people have.

      Best Budget MagSafe Case: Spigen Thin Fit MagFit

      Price: $21.99 | Rating: 4.5 stars (3,081 reviews) | ASIN: B0FD29X7T8

      This is the one I’d recommend if you want a thin, basic MagSafe case without spending Apple money. It’s slim, fits well, and adds the magnet ring you need.

      The catch: Some reviewers say the magnetic strength is weaker than Apple’s official case. If you’re using heavy accessories, it might not hold as firmly. Also, a few people said the paint chips after a few months of use.

      Best Case With a Stand: ESR Classic Hybrid with Flex Stand

      Price: $32.99 | Rating: 4.4 stars (37,978 reviews) | ASIN: B0FCY8WNZJ

      ESR has a ton of reviews for a reason — this case comes with a built-in kickstand, which is great for propping your phone up to watch videos.

      The catch: The stand is the weak point. Multiple reviewers said the hinge breaks after 6-8 months of regular use. Also, the clear version yellows after about 6 months, and some people say it’s slippery to hold.

      Best Wallet (If You Don’t Mind the Price): Apple FineWoven Wallet with MagSafe

      Price: $59.00 | Rating: 3.6 stars (449 reviews) | ASIN: B0HJB2PN4W

      Apple’s official wallet snaps on perfectly and works with Find My. It’s the most polished option.

      The catch: The 3.6 star rating says it all. People complain that it gets dirty easily and looks worn fast. The magnet is weak — cards can slip out. And it cracks after 2-6 months. For $59, that’s rough. You’re paying for the Apple logo and Find My integration, not the build quality.

      Best Car Mount: ANDERY Foldable MagSafe Car Mount

      Price: $19.99 | Rating: 4.3 stars (31,113 reviews) | ASIN: B0DN1S1YLV

      This is the best value car mount I found. It’s cheap, it holds your phone securely, and it folds flat when not in use.

      The catch: The adhesive leaves residue on your dashboard in hot weather. On bumpy roads, the phone wobbles a bit. And the plastic hinge can break after a few months.

      Final Verdict: Is MagSafe Worth It?

      Here’s my honest take: MagSafe is worth it if you use even one or two accessories regularly.

      You don’t need the whole ecosystem. Start with a charger and a case. If you find yourself loving the snap-on convenience, add a car mount or a battery pack later.

      It’s not life-changing. It’s not a must-have. But it’s the kind of small daily convenience that makes you wonder how you lived without it after a few weeks.

      If you’re on the fence, buy the cheapest MagSafe case you can find (like the Spigen one above) and try it for a month. If you don’t use the magnets, return it.

      Frequently Asked Questions

      Does MagSafe work through a case?

      Yes, as long as the case is thinner than about 2mm and not metal. Thick rugged cases (over 3mm) will block the magnets. If you have a heavy-duty case, look for one with built-in MagSafe magnets.

      Is MagSafe faster than regular wireless charging?

      Yes. MagSafe charges at faster speeds (up to 15W with Apple’s official charger) because the magnets guarantee perfect coil alignment. Regular Qi charging typically drops to 7.5W or lower if the coils aren’t perfectly aligned.

      Does MagSafe damage the battery?

      No more than any other wireless charging. It generates some heat, which is normal. Apple throttles charging speed if the phone gets too hot to protect the battery.

      Can I use MagSafe with an Android phone?

      No, MagSafe is Apple’s proprietary system built into iPhone 12 and newer. Android phones have wireless charging but not the magnetic alignment system.

      Do I need a special case for MagSafe?

      No. The magnets are built into the phone itself. A thin regular case works fine. But a MagSafe case adds extra magnets for stronger attachment, which is helpful if you use wallets or battery packs.

      How much does MagSafe cost to set up?

      You can get started for $25-40: a third-party MagSafe case ($20-30) and a basic MagSafe charger ($15-20). Apple’s official setup costs more like $100+ for case + charger + wallet.

    4. Why Do Clear Phone Cases Turn Yellow? The Real Science Explained

      Why Do Clear Phone Cases Turn Yellow? The Real Science Explained


      Let me tell you about the first time it happened.

      I’d just unboxed a brand new phone — the sleek, expensive kind with the titanium frame I’d saved up months for. I splurged on a clear case, the fancy kind that lets the phone’s original finish shine through. I kept pulling it out of my pocket just to look at it, showing it off to my friends.

      Three months later, I was sitting at a restaurant and pulled my phone out to check the time. I froze.

      The case wasn’t clear anymore. It was yellow. Foggy. Almost amber. Like someone had held it over a candle flame. Like it had been sitting in a dusty garage for ten years.

      I was mortified. I scrubbed it with dish soap that night. I tried alcohol wipes. I even bought a “phone case cleaning gel” off Amazon. Nothing worked.

      It wasn’t dirty. The plastic itself had changed.

      I had no idea why. Turns out, almost everyone who’s ever bought a clear case goes through the same thing. And it’s not your fault — it’s a chemical process that happens inside the material, not something you did wrong.

      Let me break down what’s actually going on.

      The #1 Reason: UV Photo-Oxidation

      Alt Text:UV photo-oxidation process diagram showing how clear phone cases turn yellow

      Most clear phone cases are made from TPU — thermoplastic polyurethane. It’s the soft, flexible plastic that absorbs shock when you drop your phone. It’s also the cheapest material for clear cases.

      Here’s the problem: TPU is basically a sponge for UV light.

      When sunlight hits your case, the UV photons carry enough energy to break the molecular chains inside the plastic. Think of it like pulling a Lego tower apart brick by brick — except the bricks are tiny molecules you can’t see.

      Those broken fragments then react with oxygen in the air. This reaction creates new molecules called chromophores — fancy word for “tiny things that absorb light.” As more of them form, the plastic starts to look yellow from the inside out.

      This is not surface staining. No amount of scrubbing will remove it. The yellow is baked into the material at a molecular level.

      Think of it like a sliced apple turning brown. It’s not that the apple got dirty — it’s that the flesh itself is oxidizing. Same exact idea with your clear case.

      Other Factors That Speed Up Yellowing

      UV light is the main culprit, but three other things make it happen faster:

      1. Oils and sweat from your hands

      Your skin naturally produces oil and sweat. These absorb into the TPU over time and break it down from the inside. If you’re someone whose hands sweat a lot — maybe you’re walking around in summer, or you’re just nervous — your clear case will yellow much faster.

      2. Heat

      Higher temperatures speed up every chemical reaction. Leave your phone on a hot car dashboard, or keep it in your pocket on a 35°C day, and the oxidation process accelerates.

      3. Sunscreen and hand sanitizer

      Sunscreen, hand sanitizer, even hand soap contain chemicals that can corrode TPU. You put sunscreen on your hands, then pick up your phone — those chemicals are sitting on your case all day.

      Why Some Cases Yellow Faster Than Others

      Alt Text:Comparison of TPU, hybrid, and polycarbonate clear phone cases showing yellowing speed and price

      Here’s where it gets interesting for your wallet. Not all clear cases are the same. The material they’re made from is the single biggest factor in how fast they yellow.

      MaterialHow Fast It YellowsTypical Price
      Soft TPU (all-around)3–9 months$10–$20
      Hybrid (PC back + TPU edges)6–12 months$15–$30
      Polycarbonate (PC) hard shell12–24 months$35–$60

      Soft TPU is the cheapest and most flexible, but it yellows the fastest. That $10 clear case you bought on Amazon? It’ll probably start turning yellow within a few months.

      Hybrid cases use a hard polycarbonate back panel with soft TPU edges. The back — which is what you actually see — resists UV damage much better, while the edges still give you that grippy, shock-absorbing feel. This is the sweet spot for most people.

      Polycarbonate (PC) hard shells are the most UV-resistant. They’re rigid, scratch-resistant, and take over a year before you notice any yellowing. The trade-off is that they’re less grippy and might feel slippery in your hand.

      Premium clear cases (like Apple’s official one) often add UV stabilizers — special chemicals that slow down the photo-oxidation process. That’s why a $50 case can last twice as long as a $15 one. It’s not just branding; the material and treatment are genuinely different.

      Is a $50 Clear Case Actually Worth It?

      Let’s do the math.

      Option 1: Buy a cheap $15 TPU case every 3 months.

      • Every 3 months: $15
      • Per year: $15 × 4 = $60 per year

      Option 2: Buy a $50 PC hard shell case that lasts 12 months.

      • Every 12 months: $50
      • Per year: $50 per year

      Surprise — the expensive case is actually cheaper over a full year.

      And that’s not even counting the hassle of ordering a new case, waiting for shipping, and transferring everything from the old one.

      The sweet spot for most people is actually a hybrid case — around $20–$25, lasting 6–8 months. That works out to roughly $35–$40 per year, which is cheaper than either extreme.

      If you have an iPhone 18 Pro and want specific recommendations, check out our guide to the best clear iPhone 18 Pro & Pro Max cases that don’t yellow.

      How to Slow Down Yellowing

      You can’t stop it completely, but you can slow it down:

      • Pick the right material. Go for hybrid or PC-backed cases instead of all-soft TPU.
      • Clean it regularly. Take the case off every week or two and wash it with mild soap and warm water. This removes the oils and sweat that accelerate breakdown.
      • Keep it out of direct sunlight. Don’t leave your phone on a sunny windowsill or a hot car dashboard.
      • Wash your hands first. If you just applied sunscreen or hand sanitizer, wait a minute before grabbing your phone.

      Frequently Asked Questions

      Can you reverse a yellowed clear case?

      No. Once the chromophores have formed inside the material, the change is irreversible. Cleaning might make it look slightly better, but it won’t go back to crystal clear.

      Does cleaning prevent yellowing?

      Regular cleaning removes surface oils and sweat, which can slow down the process. But it won’t stop UV oxidation — that’s happening regardless of how clean you keep it.

      Are expensive clear cases worth it?

      Yes, if you use a case for 12+ months. A $50 PC case that lasts a year is cheaper than buying four $15 TPU cases over the same period.

      Do frosted clear cases yellow less?

      Frosted (matte) clear cases do hide yellowing better because they’re not fully transparent. But the material still oxidizes — it’s just less visible.

      Do black or colored cases also yellow?

      No — yellowing is most visible on clear cases because it’s transparent. Black, colored, or frosted cases don’t show discoloration nearly as much, because the tint is already there.

      Can I spray something on my clear case to prevent yellowing? There are UV-protective sprays on the market, but results are mixed. Most don’t last longer than a few weeks, and they can make the case look cloudy. It’s cheaper and more reliable to just buy a better material.


      Clear phone cases turn yellow because of UV photo-oxidation — a chemical process that changes the plastic from within. It’s not your fault, and it’s not something you can wash away.

      The good news: you can slow it down. Choose a hybrid or PC-backed case, clean it regularly, and keep it out of direct sunlight.

      And if you want to skip the science and just buy a case that actually stays clear for more than a few months? See our top picks for the best clear iPhone 18 Pro & Pro Max cases that don’t yellow.

    5. Best Clear iPhone 18 Pro & Pro Max Cases That Don’t Yellow (2026)

      Best Clear iPhone 18 Pro & Pro Max Cases That Don’t Yellow (2026)

      Let me guess why you’re here.

      You just unboxed your new iPhone 18 Pro — maybe it’s that Glacier Blue, maybe the Burgundy. It looks incredible. You want to show it off. So you went and bought a clear case.

      And then two or three months later, it’s yellow.

      Yeah, I’ve been there too. There’s nothing more annoying than dropping $15–50 on a clear case only to watch it slowly turn the color of old butter.

      So I did what any reasonable person would do: I went down the rabbit hole. I compared every popular clear case for the iPhone 18 Pro and 18 Pro Max on the market right now. I looked at what they’re made of, how they handle MagSafe, what real users are complaining about in the Amazon reviews, and most importantly — which ones actually stay clear longer.

      Here’s what I found.

      First: Why Do Clear Cases Even Turn Yellow?

      Before we get into the picks, let’s quickly talk about why this happens — because understanding the “why” helps you choose the right one.

      Clear cases yellow because of something called photo-oxidation. Basically, UV light from the sun + the oils on your skin + the warmth from your pocket or your car dashboard = the plastic starts breaking down chemically. And that chemical breakdown shows up as… well, yellow.

      Here’s the thing though: not all clear cases yellow at the same rate.

      • Cheap all-TPU soft cases (the $8 ones on Amazon): start yellowing in 3–6 months. No way around it.
      • Hybrid cases (hard PC back + TPU bumper): the back panel stays clear for 8–12 months, but the soft edges still yellow.
      • Premium cases with UV-resistant coatings: these can go 18–24 months without noticeable yellowing.

      The key is the back panel material. Hard polycarbonate (PC) or acrylic backs yellow much slower than soft TPU. That’s why every good anti-yellowing clear case uses a hard back + soft bumper design.

      Can you reverse yellowing? Sort of — baking soda and hydrogen peroxide can brighten it up for a week or two, but the damage is already done. Better to just buy one that resists it in the first place.

      Quick Comparison Table

      The 6 Clear Cases I’d Actually Recommend

      1. Spigen Ultra Hybrid MagFit — The Safe Budget Pick

      Price: $16.99 Fits: iPhone 18 Pro / 18 Pro Max

      Let’s start with the obvious one, because it’s the one everyone buys.

      Spigen’s Ultra Hybrid MagFit has hundreds of thousands of ratings on Amazon. It’s the case that people default to when they don’t want to think about it.

      The build is solid: a hard polycarbonate back panel paired with a flexible TPU bumper. The PC back stays clear longer than most budget cases — I’d say you’re looking at 8–10 months before you notice any yellowing on the back. The TPU edges will yellow faster, but that’s true of every case in this price range.

      MagSafe works fine. The magnets align properly with wireless chargers and magnetic wallets — not the strongest I’ve tested, but totally reliable for everyday use.

      The catches:

      • Some users reported receiving the case with visible scratches already on the back panel — seems like a quality control issue rather than a design flaw.
      • A more important one: camera protection is slightly insufficient. Since the 18 Pro and 17 Pro have nearly identical body dimensions, Spigen reused the same mold. But the iPhone 18 Pro’s camera bump is slightly larger, so the raised lip around the camera opening doesn’t quite cover it fully. If you set your phone down camera-side down, there’s a small chance the lens touches the surface.

      Who this is for: If you’re the type of person who changes your case every year anyway, or you just want something reliable and cheap that won’t break the bank — this is your case. Just be aware of the camera lip issue.

      2. ESR Classic Hybrid Magnetic — The One I’d Actually Buy

      Price: $16.99 Fits: iPhone 18 Pro / 18 Pro Max

      Alright, this is the one that impressed me the most when I was doing research.

      ESR is a brand that doesn’t get as much hype as Spigen or OtterBox, but their stuff consistently punches above its weight. The Classic Hybrid Magnetic case for the iPhone 18 series has two things that make it stand out:

      First, the magnets are strong. ESR rates this at 1,500 grams of holding force. For context, Apple’s own MagSafe cases are around 1,000–1,200g. That means if you use a magnetic car mount or a magnetic battery pack, this case won’t slide off halfway through your drive. Weak magnets are the #1 complaint about third-party clear cases, and ESR actually solved it.

      Second, the back panel has an enhanced UV-resistant coating. ESR says it slows yellowing by about 40% compared to their older cases. It’s not magic — the TPU edges will still eventually yellow — but the visible back panel stays clear noticeably longer.

      Oh, and it’s rated for 12-foot drops (3x military grade). For a $17 clear case, that’s absurdly good protection.

      The catches:

      • Some users found that when the phone lays flat on a table, the camera lens still touches the surface — the raised camera lip isn’t quite high enough on this model either.
      • A few people mentioned the case feels slippery in hand — the TPU bumper doesn’t have much texture, so if you have sweaty hands, it might feel a bit slippery.

      Who this is for: Honestly? This is the best all-around pick on this list. Strong magnets, UV-resistant back, great drop protection, and it’s only $17. If you only buy one case, make it this one — just maybe add a lens protector to solve the camera-touching issue.


      3. Apple Clear Case with MagSafe — The “If You Know, You Know” Pick

      Price: $49.00 Fits: iPhone 18 Pro / 18 Pro Max

      Here’s the thing about Apple’s clear case: it’s fine.

      It fits perfectly. The MagSafe click is satisfying. The microfiber interior keeps dust off your phone. The cutouts are precise down to the millimeter. Apple even claims the materials and coatings are “optimized to prevent yellowing over time” — which is more than most brands say.

      But… is it $49 good?

      If you’re asking me, the answer is no, not really. And the Amazon reviews tell the same story.

      The catches:

      • Users consistently complain that it adds noticeable weight to an already heavy Pro Max — you can definitely feel the difference when you pick up the phone.
      • The back surface is slippery — the scratch-resistant coating that Apple applies makes the case feel smooth to the point of being slidey. A few people said it slipped right off their nightstand.
      • And yes — it still yellows. Apple says they optimized it, but it’s still polycarbonate + TPU, and it still ages. Just maybe slightly slower than the budget options.

      The only reason to buy it is if you want that seamless Apple ecosystem experience — the way the MagSafe charger clicks into place, the way the lock screen animation pops up, the way it feels like an extension of the phone itself. That’s a real feeling, and it’s worth something to some people.

      But if your main priority is “stays clear for as long as possible” or “doesn’t add more weight,” you can get that for half the price from ESR.

      Who this is for: Apple stans who want the official experience. People who want the magnetic animation to pop up on their lock screen. Everyone else, save your money.

      4. CASETiFY Compact Clear — The “I Want It To Look Cute” Pick

      Price: $45 (no MagSafe) / $55 (with MagSafe)

      Fits: iPhone 18 Pro only (as of writing)

      CASETiFY occupies a weird space in the clear case world. It’s technically a clear case, but it’s also… not just clear.

      You can get the fully transparent Compact version in two options:

      • Compact Case (No MagSafe) — $45, pure clear, no built-in magnetic ring
      • Compact Case with MagSafe — $55, built-in magnetic ring for MagSafe accessories

      The build quality is solid. The drop protection is rated for 6.6 feet, which is nice.

      But let’s be real about this one, because there are a few catches most people miss:

      The catches:

      • If you buy the no-MagSafe version, a MagSafe charger will still work — but it won’t snap into place. The charger might slide around, and charging speed could be slower because of misalignment. For $45, that’s a pretty big omission.
      • The MagSafe version costs $10 more — whether that’s worth it depends on how often you use magnetic accessories.
      • The reviews count is very low — only about 9 ratings on Amazon. This is a new product for the iPhone 18 line, so there isn’t much long-term feedback yet on yellowing or durability.
      • And of course, the TPU edges will yellow eventually. At $45–55, you’re paying a premium for the brand and the design options, not for any special anti-yellowing tech.

      Who this is for: People who care about aesthetics as much as protection. Anyone who wants a case that doesn’t look like everyone else’s. Just know which version you’re getting — and whether you actually need the MagSafe upgrade.

      5. UAG Plyo — The “I Drop My Phone Constantly” Pick

      Price: $59.95 Fits: iPhone 18 Pro only (as of writing)

      If you’re a serial dropper, this is your case.

      UAG (Urban Armor Gear) is known for making military-tested rugged cases, and the Plyo series brings that energy to a clear design. It’s rated for 16-foot drops — that’s the highest drop protection on this entire list.

      The build is: hard polycarbonate back + TPU shock-absorbing frame + air-soft corners. The PC back panel is naturally UV-resistant (polycarbonate yellows much slower than TPU), so this case actually stays clear for a long time.

      The tradeoff? Bulk. This case is noticeably thicker and heavier than the ESR or Spigen options. If you like that “barely there” feeling, you’ll hate this. But if you’ve shattered two phone screens this year, this bulk is a feature, not a bug.

      The catches:

      • It’s chunky. There’s no way around it — this is a protective case first, a clear case second.
      • As of writing, it’s only available for the iPhone 18 Pro, not the Pro Max. If you have the Pro Max, you’ll need to wait or pick a different option.
      • The Amazon reviews are still very sparse (only 2 ratings so far), since this is a brand-new product for the 18 series.
      • And like all hard clear cases, the PC back will scratch over time.

      Who this is for: Accident-prone people. Outdoor workers. Anyone who’s ever dropped their phone on concrete and held their breath. If protection comes first and clear comes second, this is your pick — as long as you have the Pro, not the Pro Max.

      6. tech21 EvoClear — The “I’m Done With Yellowing” Pick

      Price: $39.99 Fits: iPhone 18 Pro Max only (as of writing)

      tech21 is the only brand on this list that actually warrants against yellowing. If your EvoClear case turns yellow within the first year, they’ll replace it.

      That’s a bold move. And it tells you they’re confident in their materials.

      The EvoClear uses a hard acrylic back panel with a UV-resistant coating, paired with their proprietary FlexShock impact-absorbing TPU frame. It’s rated for 12-foot drops. The build quality is nice, the fit is precise, and the case feels lighter than you’d expect.

      One thing to note: the standard EvoClear doesn’t have built-in MagSafe magnets. If you want MagSafe, you need to step up to the EvoCrystal MagSafe version, which is $49.99 and rated for 16-foot drops.

      The catches:

      • The base version doesn’t have MagSafe magnets built in. You’ll need to pay $10 more for the MagSafe version.
      • As of writing, it’s only available for the iPhone 18 Pro Max, not the standard Pro. If you have the smaller Pro model, you’re out of luck on this one.
      • The Amazon review count is still small (around 10 ratings), since it’s a new product.
      • No major complaints stand out from the early reviewers — the feedback has been fairly positive so far.

      Who this is for: Anyone who’s been burned by yellowing clear cases one too many times and just wants a case that stays clear. The warranty alone makes it worth considering — assuming you have the Pro Max.

      Quick Answers to Your Questions

      Do all clear iPhone 18 Pro cases turn yellow eventually?

      Yes, but the timeline is wildly different. Cheap TPU cases: 3–6 months. Mid-range hybrid cases: 8–12 months. Premium UV-resistant cases: 18–24 months.

      Which clear case material resists yellowing best?

      Hard polycarbonate (PC) or acrylic back panels. TPU (the soft bumper edges) will always yellow faster — it’s chemically unstable under UV light. The best cases use a hard back + soft bumper combo.

      Is the Apple clear case worth $49?

      Only if you want the official MagSafe experience. The main complaints from real users are that it adds noticeable weight and feels slippery in hand. If you just want something that stays clear and protects your phone, the ESR at $17 gives you 90% of the experience for a third of the price.

      Do MagSafe clear cases slow down wireless charging?

      Only if the magnets are weak and cause misalignment. ESR’s 1500g magnets are the strongest we tested, so misalignment is basically a non-issue there. Just note that CASETiFY’s no-MagSafe version doesn’t have built-in magnets at all — a MagSafe charger will still work, but it won’t snap into place.

      How do I slow down yellowing?

      Wipe it down weekly (skin oils speed up yellowing), keep it out of direct sunlight, and don’t leave it on a hot car dashboard. Basic stuff, but it makes a noticeable difference.

      So… Which One Should You Buy?

      Here’s my honest take:

      • Best overall value: ESR Classic Hybrid Magnetic ($17). Strong magnets, UV-resistant back, 12ft drop protection. Can’t beat it.
      • Best budget pick: Spigen Ultra Hybrid MagFit ($17). Reliable and well-known, just watch out for the camera lip issue and occasional QC scratches.
      • Most protective: UAG Plyo ($60). 16ft drop protection, clear PC back, built like a tank — but only for the Pro, not the Pro Max.
      • Best anti-yellowing warranty: tech21 EvoClear ($40). They’ll replace it if it yellows — but only for the Pro Max.
      • Official Apple experience: Apple Clear Case with MagSafe ($49). You know what you’re getting — perfect fit, but heavier and slipperier than you’d expect.
      • Best design / style: CASETiFY Compact Clear ($45–55). Cute design, but watch which version you’re getting — the $45 one doesn’t have MagSafe.

      No clear case stays crystal clear forever. But pick the right one, and you’ll be showing off your iPhone 18 Pro’s color for well over a year — not just a few months.


      Disclosure: As an Amazon Associate, I earn from qualifying purchases. This doesn’t affect my recommendations — I only include cases I actually think are worth your money.